WEBIX JAVASCRIPT LIBRARY BLOG

UI development best practices, front-end programming tips and news to speed up your Web development.

Follow us:

Write for us: learn about our guest posts guidelines.

Coming Out: Webix Update 3.0

Hey everyone!

September 22 – mark the date in your calendar, because exactly on this day we will be glad to present our new major update – Webix 3.0. As autumn is a start of a working year, we decided to start it with a big upgrade.

Webix 3.0


What September 22 will bring:

  1. Webix Jet – a micro framework on top of Webix UI, which will allow you to combine and reuse all of diverse and separate UI components, and to create and develop your perfect app with minimal code footprint and without any stress.
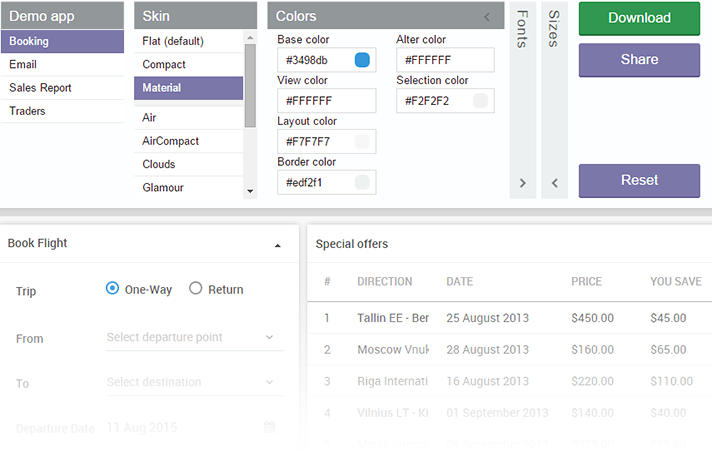
  2. Visual designer – a tool for creating UI by drag and drop.
  3. New, even more powerful functionality for grids: Sub-rows, Sub-grid, Sub-form.
    a) ability to show really complex data in the datatables
    b) nested tables
    c) master and slave data in the same table
  4. Import/Export to PNG and Excel – no longer need to take screenshots or start separate tables. It definitely simplifies tasks’ solving and saves your time.

As usual, we have something to share.

Stay tuned and see you next week!

Share it with your friends and get +3.0 to your karma!

How to Build a Mega Menu with Webix

Unlike the regular menus that you can create using the Menu Component, Mega Menus are big and wide enough to allow you place other components and widgets within them. Such a type of menus is widely used on the online shopping websites since it’s pretty easy to use them for navigation purposes.

Here’s an example of how this menu works:

Mega menu built with webix

The demo of the final mega menu with its source code is here.

In this article, we’ll create our own mega menu with Webix in a few easy steps.

Tuning Webix for Odata

As we know, web app development is a complex process that, on the one hand, consists of laborious work at the backend and, on the other hand, includes plenty of efforts while creating a nice-looking and responsive UI.

If you want to optimize the construction of your web applications, you need to find the best option for organizing your work with data as well as a fast and powerful js library for drawing app interface.

This variant can be implemented by using OData, an open data protocol for building RESTful API’s, and by adapting Webix UI library to its rules of requesting and modifying data.

Odata protocol

OData’s goal is to enable a broad access to data regardless of the way it is stored. It allows requesting and updating resources via HTTP commands and provides an entire query language directly in the URL.

Well, if you are reading this post, you probably know a lot about Webix. If suddenly no, you can find more info here. All in all, I can say that our users find it fast and easy.

twitter review of webix

Meet the Updated Webix Skin Builder

Right after the release of Webix 2.5 we’ve updated our online developer tool Webix Skin Builder. Since this upgrade, it has an built-in Material skin and small UX enhancements.

For those who haven’t used Skin Builder yet, we’ll explain the practical use of this handy designer tool. It allows creating custom skins for the UI of your web apps as well as provides you with the existing set of skins.

Material Skin

When we’ve firstly announced the possibility to apply the Material skin to your web app built with Webix, the skin wasn’t included into the library package. To download it you had to go to the special github.com repository and take the skin there. Now this skin is available right from our Skin Builder tool.

Webix Skin Builder

Webix Skin Builder will also delight you with an improved UI. Just check it to be sure that it works and looks better.

Customizing Kanban Board. Complex Structure and Swimlanes

Kanban boards allow visualizing the workflow in an easy and intuitive way. And Webix has a tool that allows you to create your own Kanban Board.

There’s already a well written guide that describes how you can use the Webix Kanban Board widget. This time we’ll take a look at some tips and tricks you can use to customize the existing project management application.

Splitting the Columns

First of all, the basics. Here’s how you can create a simple Kanban Board:

webix.ui({
    view:"kanban",
    type:"space",
    //the structure of columns on the board
    cols:[
        { header:"To Do",
          body:{ view:"kanbanlist", status:"new" }},
        { header:"Estimated",
          body:{ view:"kanbanlist", status:"estimated" }},
        { header:"In Progress",
          body:{ view:"kanbanlist", status:"work" }},
        { header:"Done",
          body:{ view:"kanbanlist", status:"done" }}
    ],
    //URL to the file with data collection
    url: "tasks.php"
});

And here’s the result:

Basic Kanban Board

1 45 46 47 48 49 61