WEBIX JAVASCRIPT LIBRARY BLOG

UI development best practices, front-end programming tips and news to speed up your Web development.

Follow us:

Write for us: learn about our guest posts guidelines.

How to Build a Mega Menu with Webix

Unlike the regular menus that you can create using the Menu Component, Mega Menus are big and wide enough to allow you place other components and widgets within them. Such a type of menus is widely used on the online shopping websites since it’s pretty easy to use them for navigation purposes.

Here’s an example of how this menu works:

Mega menu built with webix

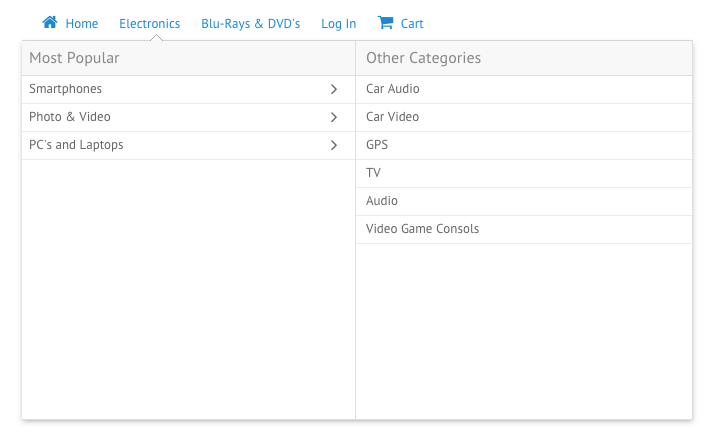
The demo of the final mega menu with its source code is here.

In this article, we’ll create our own mega menu with Webix in a few easy steps.

Customizing Kanban Board. Complex Structure and Swimlanes

Kanban boards allow visualizing the workflow in an easy and intuitive way. And Webix has a tool that allows you to create your own Kanban Board.

There’s already a well written guide that describes how you can use the Webix Kanban Board widget. This time we’ll take a look at some tips and tricks you can use to customize the existing project management application.

Splitting the Columns

First of all, the basics. Here’s how you can create a simple Kanban Board:

webix.ui({
    view:"kanban",
    type:"space",
    //the structure of columns on the board
    cols:[
        { header:"To Do",
          body:{ view:"kanbanlist", status:"new" }},
        { header:"Estimated",
          body:{ view:"kanbanlist", status:"estimated" }},
        { header:"In Progress",
          body:{ view:"kanbanlist", status:"work" }},
        { header:"Done",
          body:{ view:"kanbanlist", status:"done" }}
    ],
    //URL to the file with data collection
    url: "tasks.php"
});

And here’s the result:

Basic Kanban Board

Portal Layout Creation with Portlet

Webix version 2.4 brings you a new UI component that allows creating portal layouts in an easy and intuitive way. Portlet component can be dragged over the page and swapped with other portlets. This behaviour allows you to rearrange your web page elements the way you want. Let’s take a look at the basics of portlet usage.

Portlets Basics

You can create a basic portlet in the same way as other Webix UI components. Just set “portlet” as the view property value. The body property defines the portlet content:

view:"portlet", body:{
    // portlet content
}

By arranging portlets into rows and columns, you can create the required layout which can be easily reorganized if necessary:

rows:[
    { view:"portlet", body:{
        template:"Row 1"
    }},
    { view:"portlet", body:{
        template:"Row 2"
    }},
    { type:"wide", cols:[
         { view:"portlet", mode: "cols",body:{
            template:"Col 1"
        }},
         { view:"portlet", mode: "cols", body:{
            template:"Col 2",
        }}
    ]
    }
]

The result is shown below:

webix portlet widget

How to Create Kanban Board with Webix

During the process of web development it’s highly important to organize the workflow and keep in touch with all members of the team. There are useful tools that allow visualizing all the stages of work and keeping track of each participant’s current workload. One of such tools is a popular Kanban board. It helps to control work processes and maintain steady progress, as you can see what stage of the project should be speeded up and which one is overloaded.

JavaScript Kanban Board is a great widget that can be used for creating powerful apps intended for managing the development process.

In this article we’ll describe the stages of creating a basic Kanban Board with the Webix library. Tasks on the board will be supplemented with tags, images and personal avatars for tasks’ assignees. There will be icons that allow opening a form for editing tasks. Besides, you’ll learn how to customize the styling of the board.

webix kanban board

You can check the live demo of the ready Kanban Board.