Webix version 2.4 brings you a new UI component that allows creating portal layouts in an easy and intuitive way. Portlet component can be dragged over the page and swapped with other portlets. This behaviour allows you to rearrange your web page elements the way you want. Let’s take a look at the basics of portlet usage.
Portlets Basics
You can create a basic portlet in the same way as other Webix UI components. Just set “portlet” as the view property value. The body property defines the portlet content:
// portlet content
}
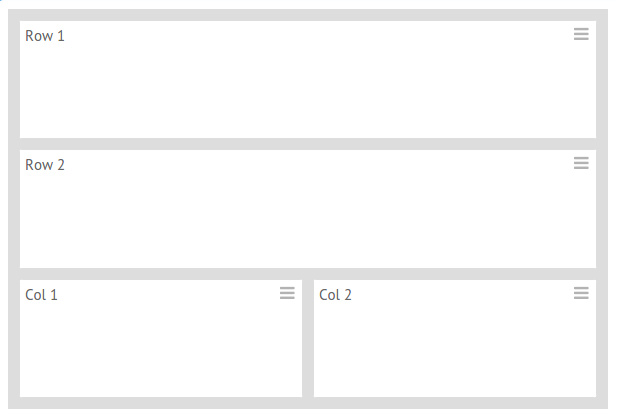
By arranging portlets into rows and columns, you can create the required layout which can be easily reorganized if necessary:
{ view:"portlet", body:{
template:"Row 1"
}},
{ view:"portlet", body:{
template:"Row 2"
}},
{ type:"wide", cols:[
{ view:"portlet", mode: "cols",body:{
template:"Col 1"
}},
{ view:"portlet", mode: "cols", body:{
template:"Col 2",
}}
]
}
]
The result is shown below:
The snippet page for this example.
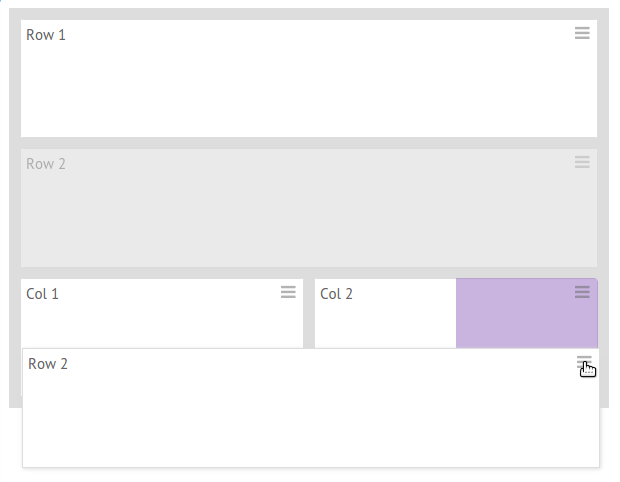
You can drag and drop the proper portlet to change the initial layout. Notice that a new possible position will be highlighted during the movement:
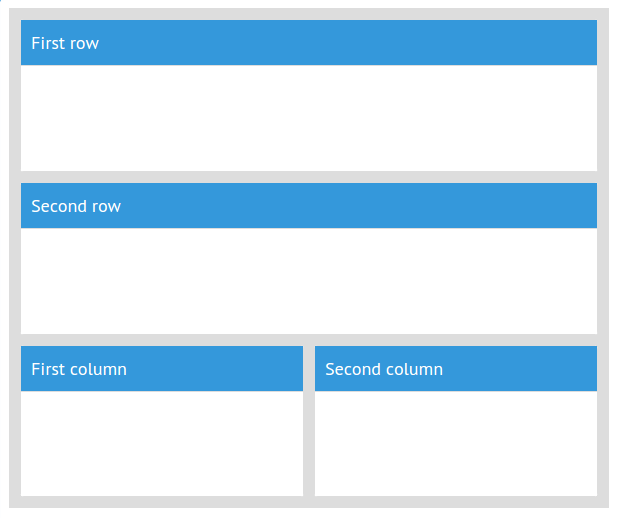
Webix allows you to define a header for the portlet. You can drag portlets by these headers. Headers also help a user to find the proper part of your web app faster. You can define a header using the header property:
// portlet content
}
Here’s how portlets with defined headers look like:
Feel free to play with the source code.
Modes of Moving Portlets
The mode property allows you to redefine the default movement behavior.
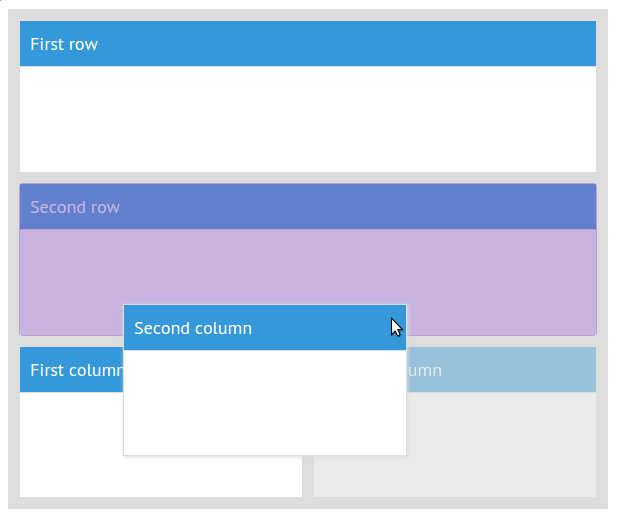
By default, if you move the Second column of our previous example to the right side of the Second row, the layout will change as it’s shown in the screenshot below:
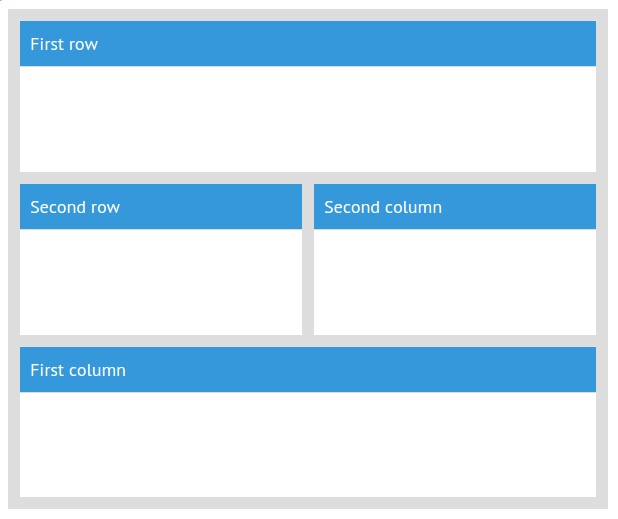
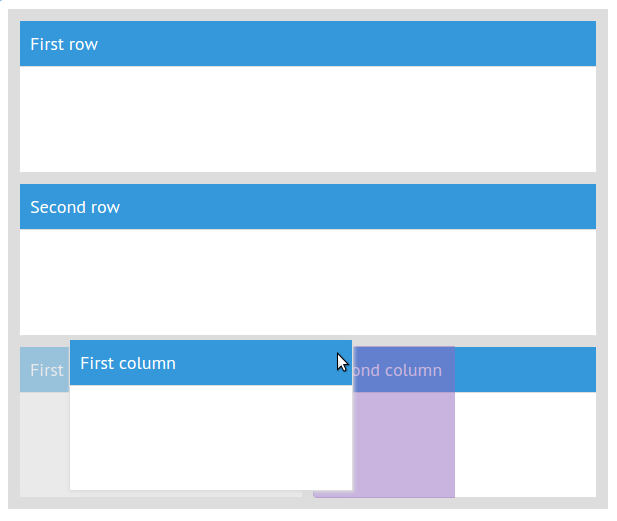
If it’s not the behavior you expected and a big wide second row was initially planned, you can use the mode: “replace” property. A portlet with this property enabled will be replaced with the moved portlet. You can use this feature if you want to swap two portlets, for example.
You can try replacing portlets here.
Moreover, you can limit the direction of portlets moving to either horizontal or vertical. Correspondingly, a portlet will be able to be placed either as a column or as a row. When you use the mode: “cols” property for a portlet, it can be moved only horizontally. Similarly, the mode: “rows” will allow vertical dragging only.
Here’s an example that may help you to understand how it works.
Try to swap the rows and you’ll see that you can move them along the Y-axis only. Unlike default portlets in the first example.
Adding UI Components
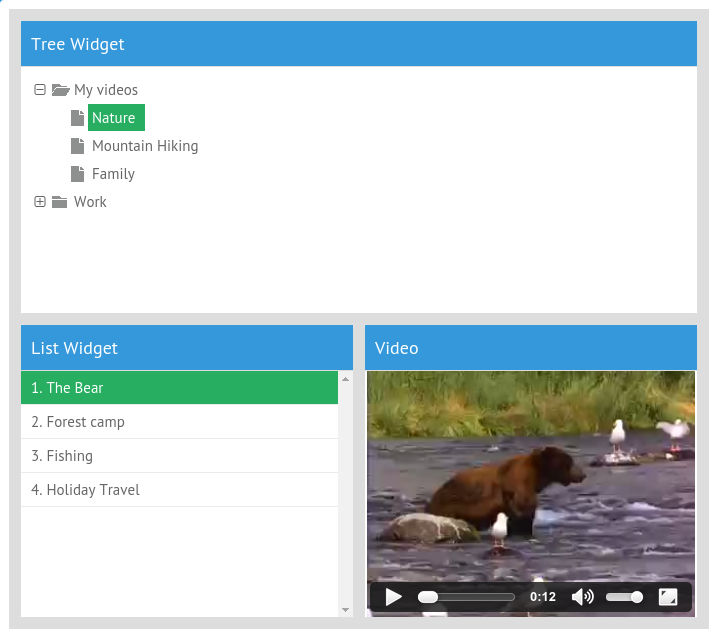
After the required layout is defined, you can grab one of the available UI components and add it to any portlet you want. Choose a couple of them randomly and, who knows, maybe you’ll create a web application that everybody’s waiting for.
Here’s an online movie collector as an example:
You can check it here.
Conclusion
With portlets, there’s no need to write any additional code for rebuilding a page layout. Just use as many portlets as you need, define their movement mode, set headers if needed, add any UI components and relax! In case you’ll need to change anything, you can simply redefine portlets behavior and their content.


