With the help of Webix you can create a web app which will work equally well on both desktop and mobile devices. However, it still remains only an HTML page. In order to create a native app, you need some other tools.
PhoneGap is a free and open source framework that allows you to create mobile apps using standardized web APIs for the platforms you care about. Phohegap works on base of HTML5 and can be used to create native app for all major mobile systems – iOS, Android, Windows Phone and others.
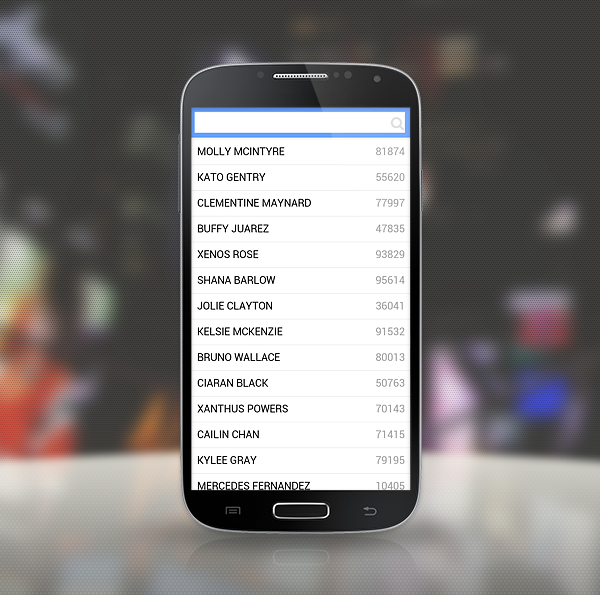
In this tutorial we will describe the process of creating a simple native app by means of Webix and PhoneGap tools.
You can get the final code of the application from github.
Getting Started
For PhoneGap to work you need to install the following dependencies:
- install the latest nodejs. After that you can run the command “npm install -g phonegap” to install the PhoneGap itself.
As we are planning to test our app on an Android device, you need to have the Android dev tools:
- you need to install jdk and ant tools. After unpacking the packages make sure to set JAVA_HOME and ANT_HOME shell variables to the folders with “jdk” and “ant” tools’ files, respectively. Also you need to add the path to the “bin” folders of the both tools to the PATH variable:
- after that you need to install the Android SDK and add the “platform-tools” and “tools” folders to the PATH:
When the preparations are finished we can start building an application.
Creating the App
Step 1
To begin with, run the following command from the command line:
It will create the folder “myapp” with all the necessary files inside. The only subfolder we are interested in is “www”. We will store all HTML and JS code that will be used in our app in this folder.
Step 2
Copy Webix .js and .css files to “www/webix”. Make sure also to copy the “imgs” folder from Webix package to “www/webix” directory. It is needed for showing icons in our app.
After that we can write HTML code of our demo app. PhoneGap has already created the “index.html” file. We need to add references to Webix files into it:
Step 3
Now we can place the UI configuration:
var toolbar = { view:"toolbar",
elements:[
{ view:"search", value:"", on:{
onTimedKeyPress:function(){
$$('list').filter("firstname", this.getValue());
}
}}
]
};
var list = {
view:"list", id:"list", select:true,
template:"html->item_list",
url:"contacts.json",
on:{
onItemClick:function(id){
$$('details').show();
$$('details').setValues(this.getItem(id));
}
}
};
var template = { template:"html->item_details", scroll:true, id:"details" };
webix.ui.fullScreen();
webix.ui({
rows:[
toolbar,
{ cells:[ list, template], id:"multiview" }
]
});
});
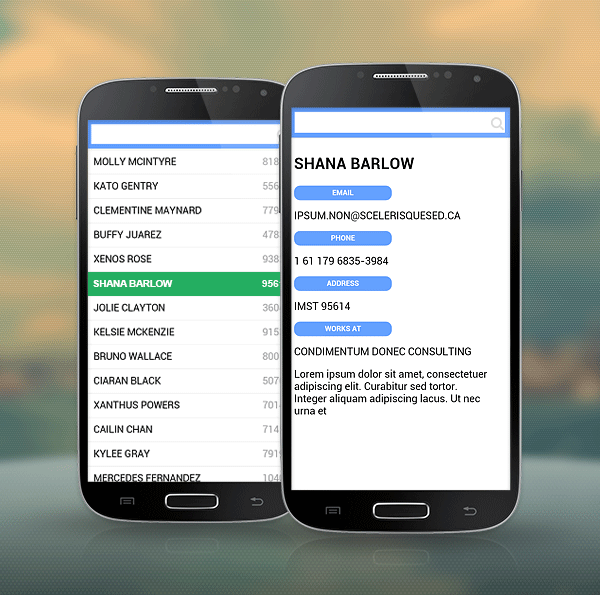
The above code will create a simple UI with a filter box on the top and a list with a selection functionality below. After clicking on any record the app will show the “details” screen.
There are two templates used in the code: the first one – for an item of the list, the second one – for the “details” screen. We can define them in the “index.html” as follows:
<div id="item_details" style="display: none;">
<h2>#firstname# #lastname#</h2>
<div class="infoline">
<h4>Email</h4>
#email#
</div>
<div class="infoline">
<h4>Phone</h4>
#phone#
</div>
<div class="infoline">
<h4>Address</h4>
#city# #zip#
</div>
<div class="infoline">
<h4>Works at</h4>
#work#
</div>
<p style="max-width: 320px;">#details#</p>
</div>
Step 4
Finally, we need to specify the data source. For this purpose you need to create in the “www” folder a “contacts.json” file with the following content:
{"firstname": "Nero", "lastname": "Perry", "phone": "1 30 449 3970-3976", "city": "Castiglione del Lago", "zip": "93674", "email": "et@Nunc.com", "details": "Lorem ipsum dolor sit amet, consectetuer adipiscing elit. Curabitur sed tortor. Integer aliquam adipiscing lacus. Ut nec urna et arcu", "work": "Eget Lacus Mauris Inc."},
{"firstname": "Hayden", "lastname": "Knowles", "phone": "1 84 924 2122-4191", "city": "Grimbergen", "zip": "16780", "email": "ante@montesnascetur.co.uk", "details": "Lorem ipsum dolor sit amet, consectetuer adipiscing elit. Curabitur sed tortor. Integer aliquam adipiscing lacus. Ut nec urna et arcu imperdiet ullamcorper. Duis at lacus. Quisque purus sapien, gravida", "work": "Arcu Vivamus Corporation"},
{"firstname": "Cade", "lastname": "Griffin", "phone": "1 85 309 5226-7368", "city": "Bungay", "zip": "43023", "email": "Class.aptent@Cras.edu", "details": "Lorem ipsum dolor sit amet, consectetuer adipiscing elit. Curabitur sed tortor. Integer aliquam adipiscing", "work": "Fusce Mollis LLC"}
]
That’s all. To test the app you can open the “index.html” file in a browser. Make sure to use some web server, as loading by “file://www/index.html” will not work. If everything is fine, you will see a fully functional app, that will look like this:
If you want to learn the code in details, take a look at this blog post.
Deploying the app to a device
To run the same app on a device you need to connect the device to a PC and run the following command from the command line:
This command needs to be executed from the application folder (“myapp” folder in the present case). If everything goes fine, a new app called “HelloWorld” will appear on your device. This app will have the same UI and logic as “index.html” page does. If UI is too small, you can change the following line in the “index.html” file
to this one
or even to this one
After each change you need to run the command “phonegap run android” again to push the changes from HTML code into the native app on the mobile device.
One more thing which can be improved is the support of the “Back” button. Currently, pressing the “Back” button will close the app. But it would be nice to use this button for returning from the “details” screen to the main list. To enable the desired functionality we need to add one more handler into the file “index.html”:
document.addEventListener("backbutton", function(){
if (!$$("list").isVisible())
$$("list").show();
}, false);
}, false);
Now you can push the changes to the device ( run “phonegap run android” ). From now on pressing the “Back” button must be handled by the above code. So from the “details” screen the “Back” button will navigate us to the main screen.
Adding the gloss
Back button
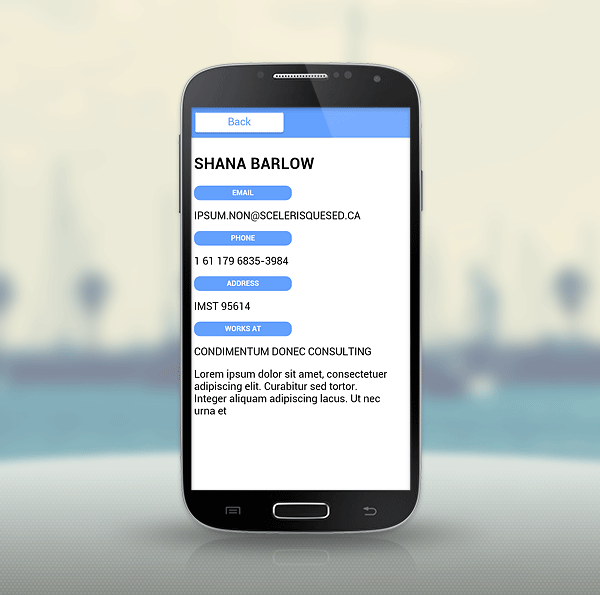
Our app is almost ready but it still has some problems with usability. Thus, the “details” page doesn’t have a visible “Back” link and fully relies on the hardware “Back” button. It may be enough for Android, but there is no hardware button on iOS devices. So let’s fix it.
In index.html we can adjust the code of toolbar by adding the back button and defining batches. Batch is a logical group of buttons. We have two batches: one for the main screen (batch main), the second one for the “details” screen (batch details):
view:"toolbar",
id:"mainbar",
visibleBatch:"main",
elements:[
{ view:"search", value:"", on:{
onTimedKeyPress:function(){
$$('list').filter("firstname", this.getValue());
}
}, batch:"main" },
{ view:"button", value:"Back", width:150, batch:"details", click: function(){
$$("list").show();
$$("mainbar").showBatch("main");
}}
]
};
The new button that we’ve created has a click handler that will show the main view and instruct the toolbar to show the “main” batch of buttons.
To be in sync we also need to update the code that shows the “details” screen:
$$("mainbar").showBatch("details");
$$('details').show();
$$('details').setValues(this.getItem(id));
}
We have added the showBatch command here. It will show the “details” batch of buttons when the “details” view is shown. To test the new functionality open the page in a browser or run “phonegap run android” command to test the modifications on a real device.
Grouped list
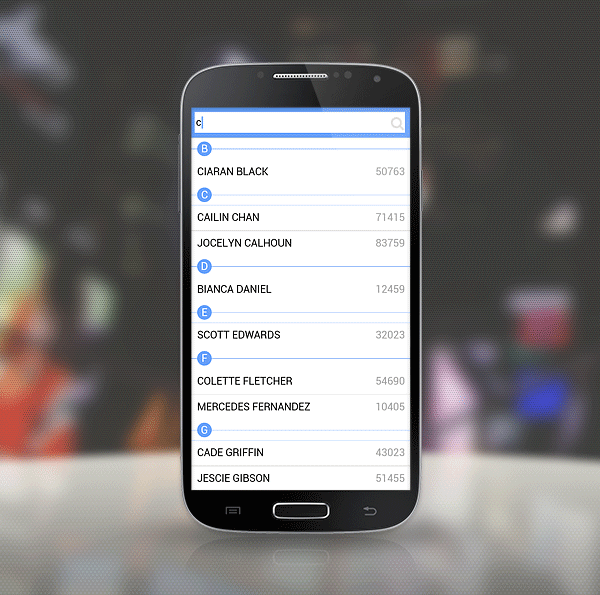
The initial screen of the app contains a list of users. It’s fine but navigation through this huge list is not so handy. We can improve this situation by grouping users by the first letter of their second name. In terms of Webix components it means replacing the component “List” with the “Unitlist”one.
Let’s change the related code in index.html like this:
view:"unitlist", id:"list", //view:list changed to view:unitlist
uniteBy:function(obj){
return obj.lastname.substr(0,1);
},
template:"html->item_list",
The uniteBy function defines the logic according to which data will be grouped.
Actually, that is all. Just run the app in a browser or update it on your mobile device. As a result, you will see the final look of the app.
Conclusion
In a few simple steps we have created a native app for an Android device. The same thing can be done with any Webix based app. You can code for the web and then convert the HTML app into a nice-looking native app without any modifications in the code. Also, the described technique is not limited to Android devices only. PhoneGap can generate native apps for devices running iOS, Firefox OS, Windows and other OS.
