The New Webix Jet has come to light with the latest release of Webix UI library.
Webix Jet is a micro framework for single-page applications created with Webix UI components. It allows you to divide app code into modules as well as combine and reuse diverse UI components. The framework provides a solution for device-responsive apps that can be opened on both Desktop and mobile touch devices that run iOS, Android, etc.
With Webix Jet, you can easily create and develop perfect applications with loosely-coupled code. Sounds intriguing? Let’s look closer at what’s new in Webix Jet 1.0 and recap the useful features that migrated from the previous version.
You can also read Jet GitBook and download demos from GitHub.
New Jet in a Nutshell
Coding in the new Webix Jet is now simpler, while view configuring is much more flexible, because in addition to raw JS objects you can use ES6 classes. With the new Jet, you can create multilevel apps by including app modules as subviews. Routing has also become more flexible due to a number of predefined routers and the ability to define custom ones. Webix Jet uses a Webpack-based toolchain that makes apps easily configurable. The updated framework can reuse code written for Webix Jet 0.x, so it should be rather easy to migrate to the new codebase.
Useful Links
To get started with new Webix Jet, download or clone the Jet Start repo. The php branch has a demo with authorization/authentication of users and an example of a PHP backend.
Jet Demos repo has examples of creating guards, working with plugins and routers, and demos with elegant solutions for common tasks.
For more details, read a tutorial on GitBook. The tutorial is also available on GitHub, so you can find out about all the changes in the book at once.
You can also check out this online demo to see what complex UIs can be created with Jet.
Webix Jet Core Concepts
Modules
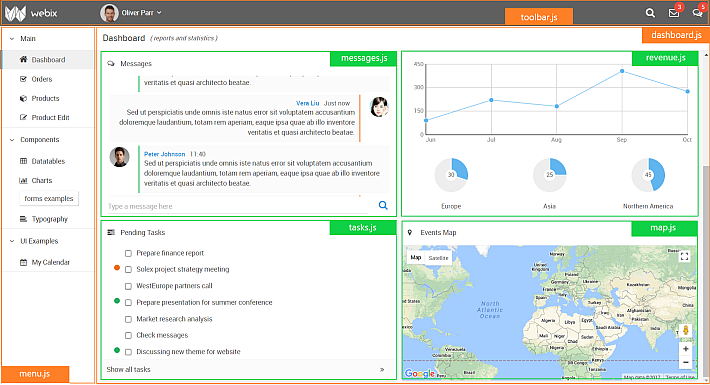
The core concepts of Webix Jet are view modules and routing. Code and UI are split in isolated modules. Modules can be reused in many places across the app. Splitting into modules helps you keep your code loosely-coupled and makes it more difficult to break the app. All modules can be developed and tested separately.
UI modules are called views and are grouped into apps, which represent applications or application modules. Views can enclose other views or even apps. Enclosed views are called subviews. View modules can be defined in three ways that produce more or less the same result. The most flexible one is ES6 classes. Apart from UI config, view classes have redefinable methods for major events like initialization and URL change. You can also check out View API in the tutorial.
Compare two versions of the same simple layout created with the old and new Jets:
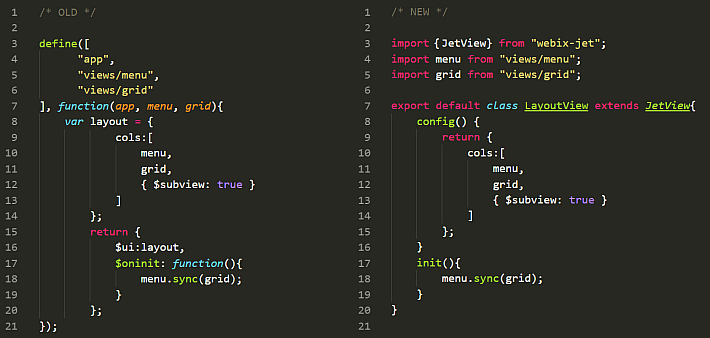
It’s good practice to keep UI and data loading and saving logic separately. There is one more type of modules for data called a model.
App Modules
Apps are defined as class instances:
const app = new JetApp({
id:"MyApp",
ver:"1.0",
start:"/layout"
}).render();
The configuration of the class instance includes app config such as the app ID, version, initial URL, and others parameters. You can find JetApp API in the GitBook.
Routing
The URL of the page reflects the current state of the UI. The URL instructs the app which view modules to show. You can use several ways to show different modules of a single-page app, including Jet links or native URL links.

Besides, the new Jet has more flexible routing. You can choose a router for in-app navigation among four predefined types or define a custom one. For example, if you prefer to display the URL without a hashbang, you can choose UrlRouter:
const app = new JetApp({
id:"MyApp",
ver:"1.0",
start:"/layout",
router: UrlRouter
}).render();
Latest Features of Webix Jet
Webpack-based Toolchain
As the new Webix Jet uses a Webpack-based toolchain, it is easier to resolve module dependencies, to organize code and reuse components among multiple entry points of your app. Single-page apps become easily configurable. For example, you can change the default app config in webpack.config.js if you want your app to have several entry points.
package.json contains predefined scripts for common tasks. For instance, when your app is ready for production, run npm run build to create minified bundles for every entry point of your app. After that, all you have to do is upload the contents of the codebase folder and your HTML file to the production server.
Plugins for Task Solution
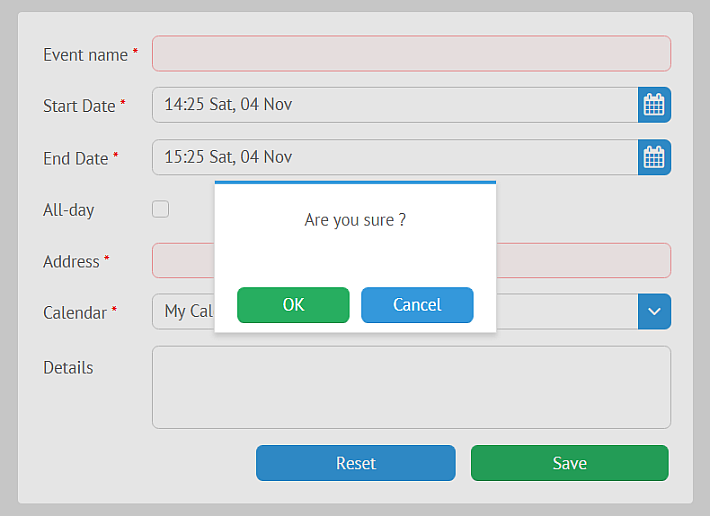
New Jet has a set of plugins that are designed to solve common tasks such as creating menus, access control, warning about unsaved data, localization, status notifications and applying skins. For example, the User plugin will help you control access to your app. And if for some reasons, like unsaved form data or insufficient access rights, you want to block routing, use UnloadGuard. You can also define your own plugins for other tasks.
Better Debugging and Event Handling
For more insights into the nature of errors that might occur, you can enable debugging in your app config and make use of error events.
const app = new JetApp({
id:"MyApp",
ver:"1.0",
debug: true,
start:"/layout"
}).render();
Besides error events, Webix Jet has other inner events that can be useful.
Instead of Hundreds of Words
Webix Jet is more than can be said in nine hundred words. You can try it and evaluate it yourself. Download the start package, read the reference on GitBook, and develop apps. If you have any questions, feel free to leave comments in the reference.
