As a rule, companies work with a lot of data and already use Excel files in their workflows. Among other things, business process automation requires shared access to files. For sharing, Excel files can be published as web pages or uploaded to web services like Google Docs. And still, there is a problem because such services do not allow you to embed spreadsheets into web applications and web sites. I’ll show you how Webix UI library can help you with this task.

Benefits of Using Excel Files
Excel is probably the most popular software in the world of business and finance. It can be used for complex statistical analysis, yet its interface is intuitive. A lot of people are used to Excel, some have been working with it for decades. So they are unlikely to switch to something completely different. Thus using Excel files along with web apps can be a good idea.
There are some problems, though. For instance, it’s difficult to keep track of the changes made by people who work with the same files. A solution is embedding Excel files into web apps to let users access them together and always get the latest edit. Webix allows doing this in several ways.
ExcelViewer
To let users view all or part of the data from Excel files in your applications, you can create ExcelViewer on the page. You can do it with just a few lines of code: specify the view type and set the URL with the path to the target file.
view:"excelviewer",
url:"binary->//webix.com/packages/articles/data.xlsx"
});
To load data from Excel, you should use the binary proxy. binary is an object for loading and reading the contents of files as an ArrayBuffer.
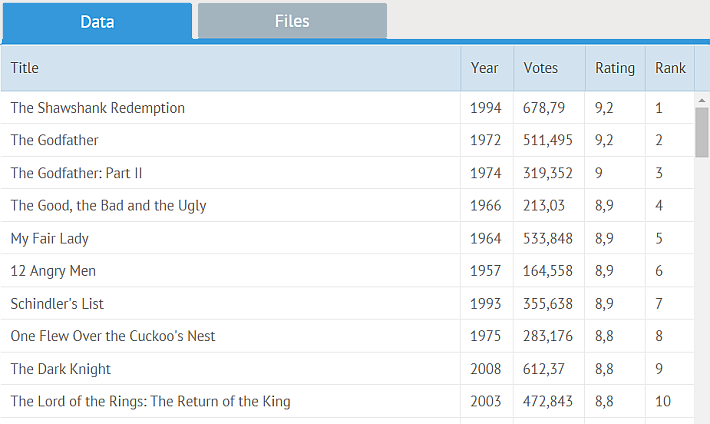
To display the headers from your Excel files, add a property to the excelviewer view: excelHeader: true. Besides, if you want to display the list of the files alongside with the contents of the file, add an ExcelBar, which will create two bars – Data and Files:
rows:[
{ view:"excelbar", id:"bar1" },
{ view:"excelviewer", excelHeader:true, toolbar:"bar1",
url:"binary->//webix.com/packages/articles/data.xlsx" }
]
});
SpreadSheet
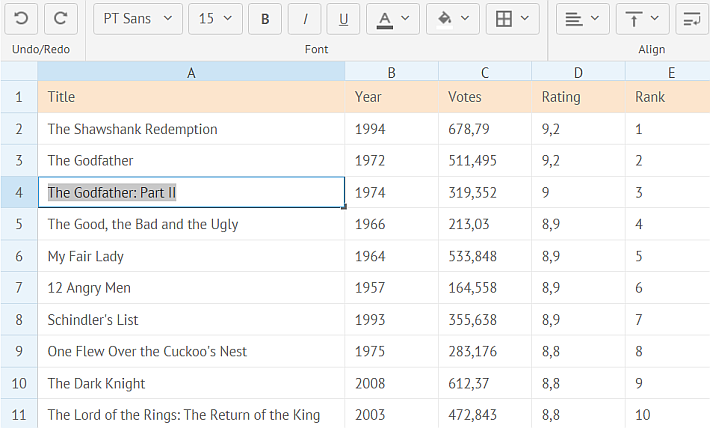
Besides viewing the data, you can also enable editing just like in desktop applications. SpreadSheet might be a solution for you here. To be able to use it, you need to include SpreadSheet files first. After that, you can effortlessly initialize a spreadsheet and load data into it:
view:"spreadsheet",
url:"binary->//webix.com/packages/articles/data.xlsx",
datatype:"excel"
});
The data loading is very similar to that in ExcelViewer. Don’t forget to set the datatype property to “excel”, that’s all. Now your users can view and edit the Excel file.
Presenting Excel Data: Loading Data into DataTable
If you want to create your own UI, process the data and present it in your app in various ways, you can load it in different components. For instance, you can load the data into DataTable. This solution is also easy to implement:
rows:[
{ view:"datatable", datatype:"excel",
url:"binary->//webix.com/packages/articles/data.xlsx",
autoConfig:true
}
]
});
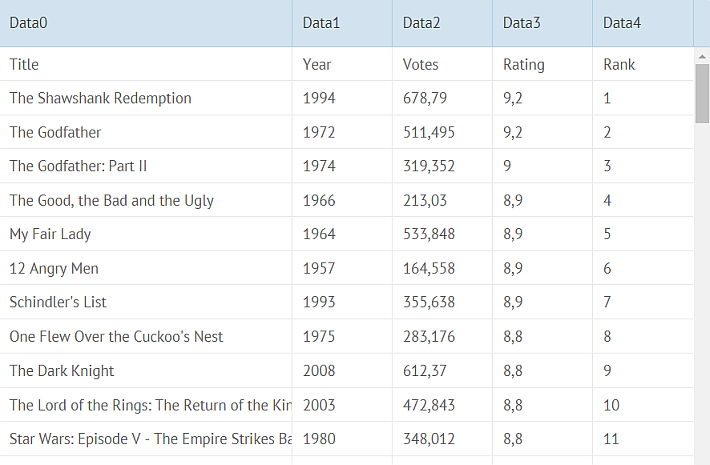
The autoConfig property simplifies the configuration of the datatable, but if you use it, you might not like the way your data looks:
Formatting and Data Processing in DataTable
The good news is that you can decide for yourself. If the headers of the Excel file are meaningful words like “title”, you can make use of the columns property of DataTable. Alas, sometimes people who create the files are not so clairvoyant. Therefore you need to change these names and after that have the datatable to display them as headers. Besides, you might want to display only some of the columns. Meet datatable.scheme, which is meant to save the day:
$init:function(obj){
obj.title = obj.data0;
obj.year = obj.data1;
}
}
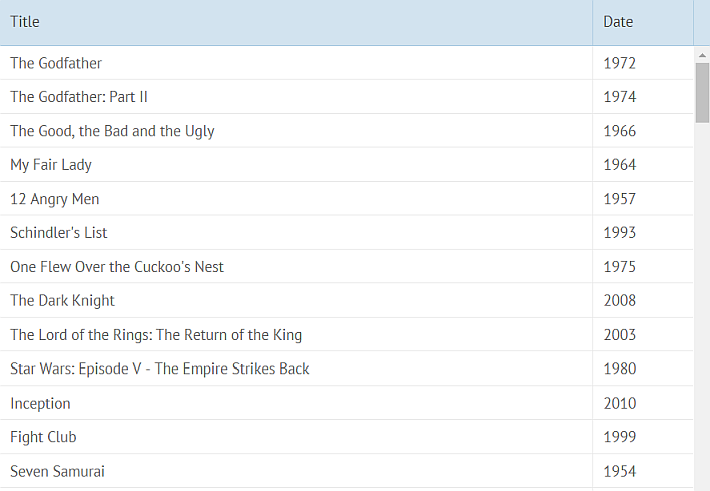
By setting the $init property, you can change the initialization of the datatable. For instance, only two columns will be shown with different headers here. Now you can set the columns:
{ id:"title", header:"Title", fillspace:true },
{ id:"year", header:"Date" }
]
Now there’s no need in displaying the headers in the first row of the datatable, so you can hide them. Change the url property for that:
Here I added a delimiter and two parameters:
- Data that tells the datatable which sheet to display;
- [1] that specifies the rows for displaying (beginning from the second, thus omitting the headers).
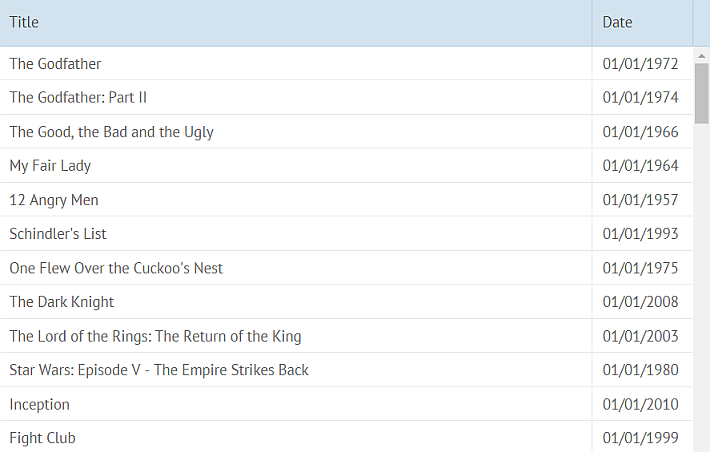
In case you want to format dates before displaying them, it’s not a problem either. For instance, if you want to display the contents of the second column as dates in some particular format, e.g. mm/dd/yyyy, you can change the type of the column data:
After that, change the format of displaying this column in the columns property:
webix.i18n.dateFormatStr converts a Date object to a string in the default date format. Other ways can be chosen as well.
Reading Data from Excel with Arbitrary Code
You might also want to load the data and process it in some other way without displaying it. You can load, then parse the data, store them in a JSON variable and use it in your app. Make use of webix.ajax(), which returns a promise, and create a whole chain of promises:
.response("arraybuffer")
.get("//webix.com/packages/articles/data.xlsx")
.then(function(data){
return webix.DataDriver.excel.toObject({ data, options:{ ext:"xlsx"}});
}).then(function(parsed){
var sheet = webix.DataDriver.excel.getSheet(parsed, { name:"Data" })
webix.message("Data in 5th row - " + sheet.data[5].join(", "));
});
In the code above, first I specified the format of a response, then sent the GET request. When the promise resolves with success, the data will be parsed and then stored in a variable, which can be used further.
Exporting Data to Excel
Apart from letting users view Excel files, you might want to let them save the data back to Excel. Webix has the toExcel() method for exporting data that can be applied to all data components. The method takes the ID of the component or its object variable as a parameter. Let’s add this functionality to the datatable:
rows:[
{ view:"button", value:"Export", click:function(){
webix.toExcel($$("d1"));
}},
{ id:"d1", /* same old datatable */ }
]
});
Users may need to select specific columns, format them and unite some columns into a new one with some custom name. You can do that by providing a second parameter for toExcel(): an object with needed datatable configuration.
Export of Any Arbitrary Data
You can export any data to Excel, not just data from visual components. For example, the data can be stored as a JS array. To send it to Excel, you can parse it into DataCollection, a mixin for storing non-hierarchical data, and apply the method to this collection:
rows:[
{ view:"button", value:"Export", click:function(){
var d = new webix.DataCollection();
d.parse([
["Alex Brown", "72", "1144-55" ],
["Donna Marlou", "67", "1187-52" ]
], "jsarray");
webix.toExcel(d);
}}
]
});
You can also format the data. For example, you can provide headers and set colspans:
columns:[
{ id:"data0", header:"Name", width:200 },
{ id:"data1", header:"Age", width:100 },
{ id:"data1", header:"HD Number", width:100 }
]
});
With toExcel(), you can export data from other data components (e.g. List, Tree, TreeTable) and change the format of the data in a lot of ways. Tabular data can also be exported to CSV.
Conclusion
Using Excel files in web applications is great if you process a lot of tabular data and need to share and co-edit it with your colleagues quickly and effectively. Such widgets as ExcelViewer could be a good solution for sharing, and SpreadSheet can be a tool for editing that follows a familiar Excel pattern. Further data processing can be achieved by loading and exporting data to and from other widgets. Besides, you can use the data from Excel in any other way with JavaScript. You can also export any data back to Excel files, including data from widgets.
Apart from working with Excel files, Webix provides export and import from/to PDF files:
You can also export charts or other visual data as PNG-images:

