Reading time: 8 minutes
Webix Hint is a widget for creating guided tours through apps. This is especially suitable for apps with a lot of contents and complex forms. With Hint, you can create guides with several steps. On each step, users will see a focused area and instructions how to work with the specific element of the app.
I’ll show you:
- Basic Hint usage Live demo >>
- Highlighting some areas and making others work as action targets Live demo >>
- Creating tours for many views Live demo >>
- Resuming tours from any step Live demo >>
For demonstration, I’ll create a mock service for ordering medications online. I’ll deal with the UI aspect only.
Base UI for the Demo
Guided tours can be useful for different apps, e.g. booking apps and online shops. I’ll create the UI of a mock service for ordering medications online. If you are interested mostly in Hint usage, you can jump to the Hint Usage step.
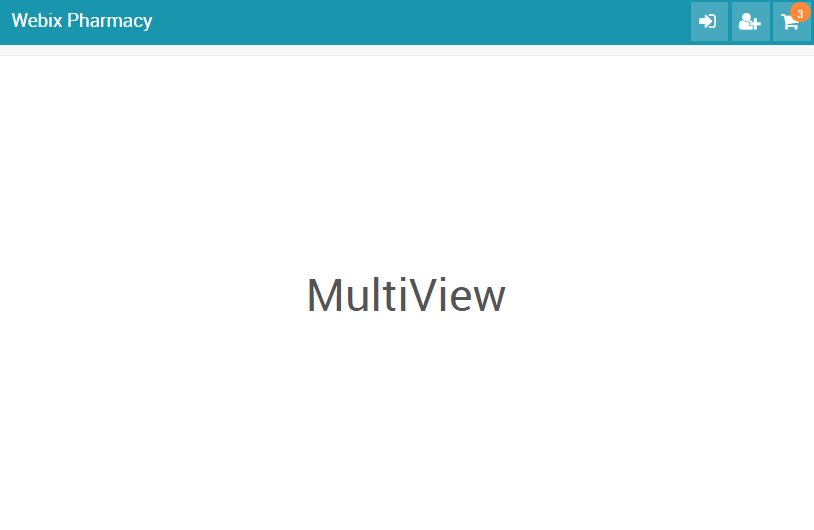
Here are the main parts of the UI.
Layout and Toolbar
I’ve placed all main demo components into MultiView. The icons and the label on the toolbar show cell contents.
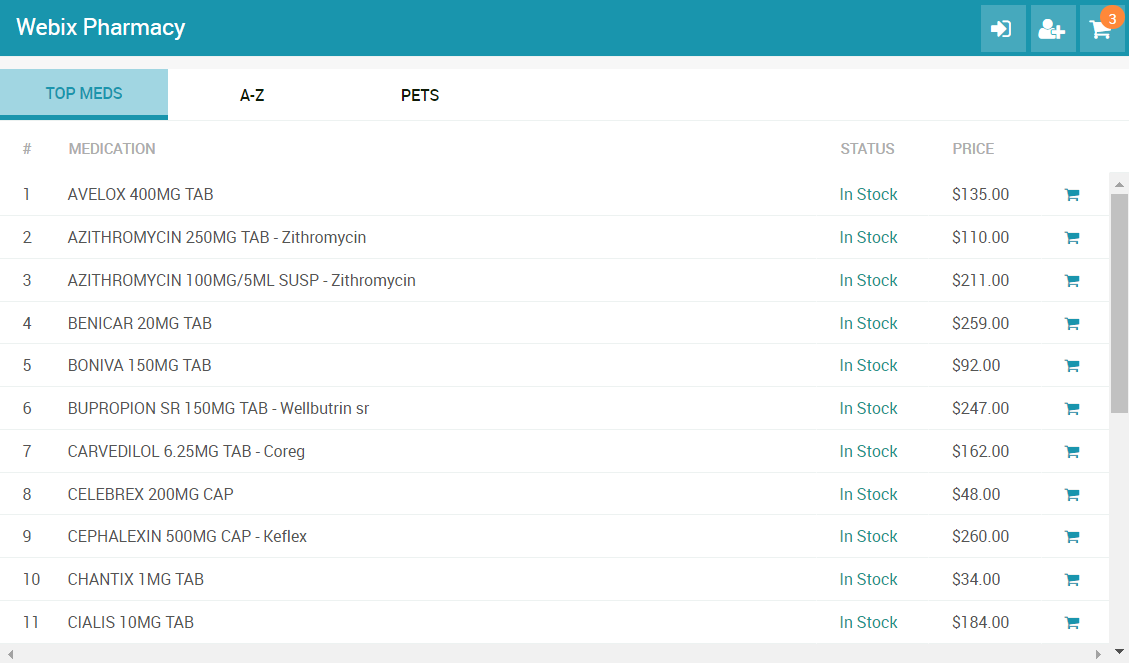
Medications List
The first cell of the master MultiView is a TabView. It contains three DataTables with lists of medications. A tabbar is used for switching between lists.
Cart
The next cell of the multiview contains the shopping cart. I also used DataTable to display the list of meds.
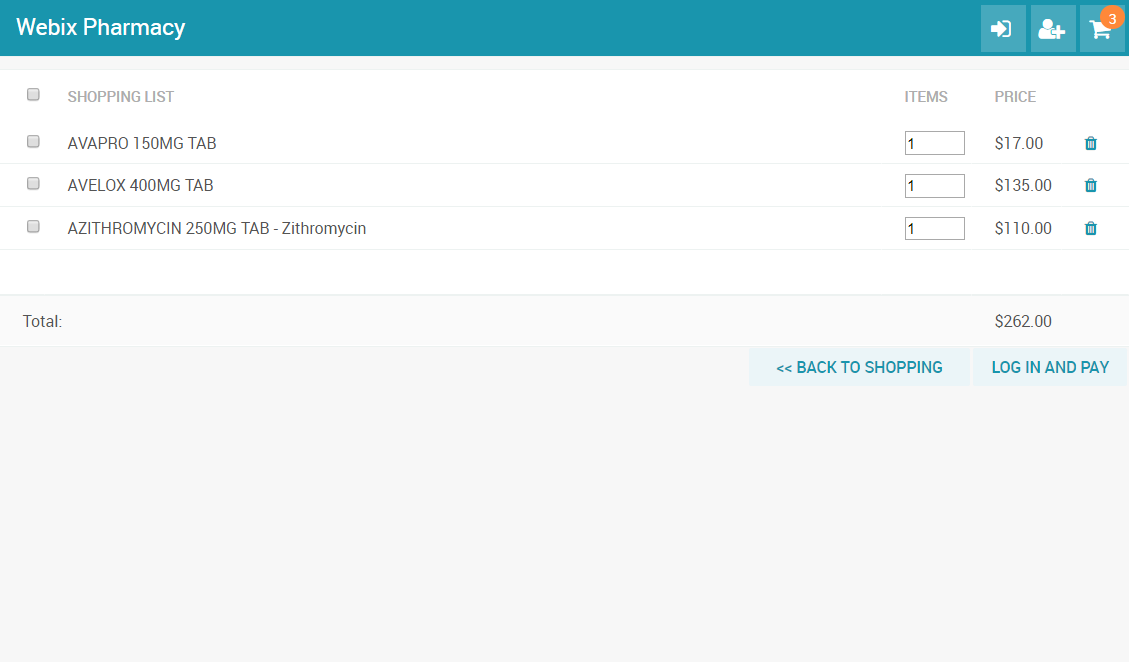
There are checkboxes in the first column of the datatable. The Back to shopping button returns you to “Drug List”, and the Log in and Pay button opens Login Form. This form can also be opened with the first icon on the toolbar.
Login Form
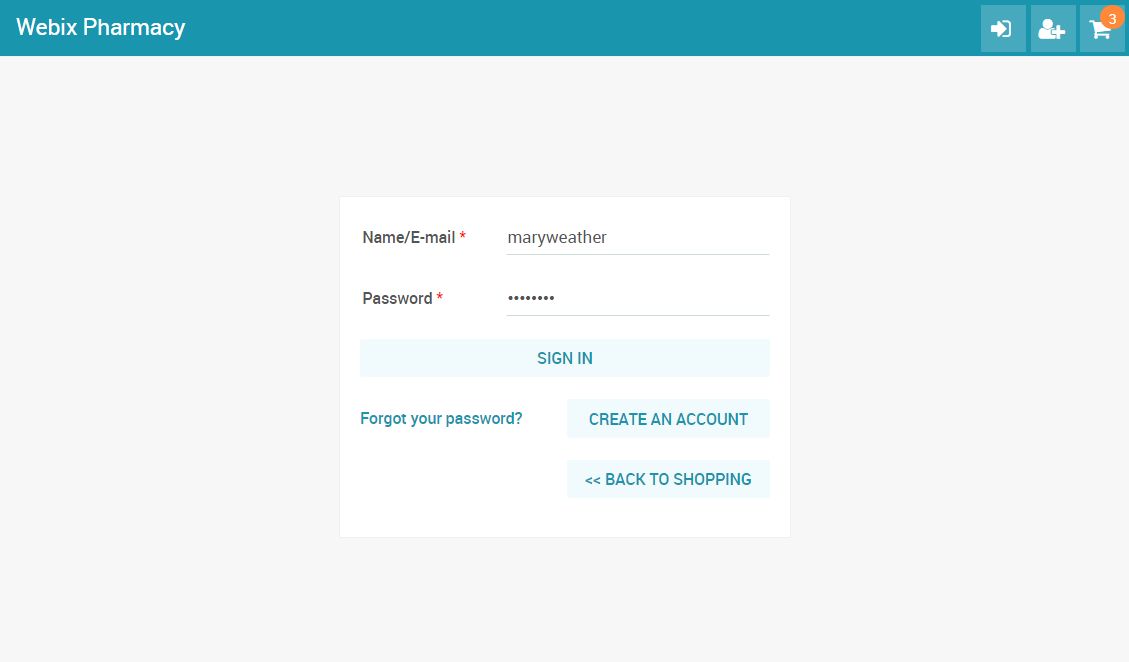
A similar form is created for adding an account. That form opens when you click Create an account or the second toolbar icon.
If you click Sign in, the cart will open again, this time with the user’s name on top.
Logging in and out is imitated to some extent. Actually, I just change views and show/hide buttons, so that the demo would resemble a real online shop.
Credit Card View
A form for entering credit card credentials opens when you click Pay in the cart after logging in.
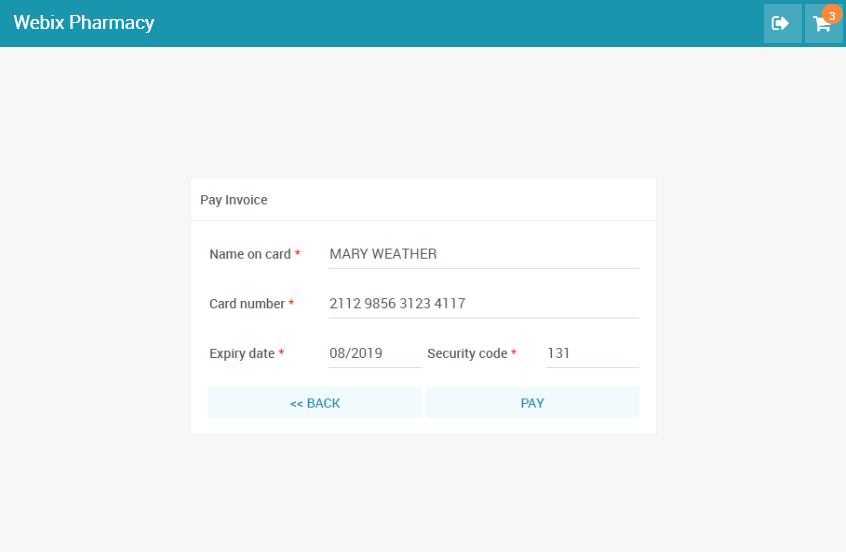
Finally, if you fill in the form and click Pay, a template is shown. After a couple of seconds, the template will give way to the starting point – Drug List.
Webix Hint and Where to Find it
The source files of the Hint widget are located separately from the main library package. You should download them from a GitHub repository. After that, you need to unpack and include Hint files into your HTML file:
Here is how you can initialize and start Hint with two steps:
view: "hint",
id: "hint",
steps: [
{
el: "div[button_id='grid_main']",
title: "Welcome to Webix Pharmacy!",
text: "Here you can order medications",
event:"click"
},
{
el: "div[button_id='grid_vet']",
title: "Meds for Pets",
text: "Look for meds and other goods for your pets",
event:"click"
}
]
}).start();
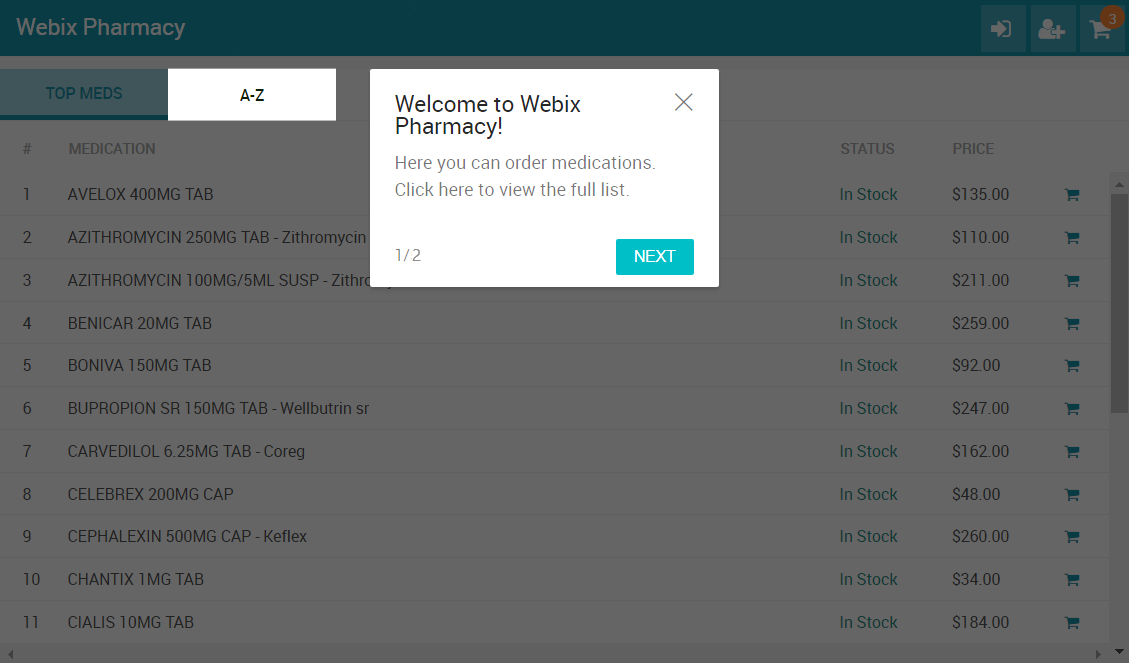
Hint can have any number of steps. Steps must be defined as an array of objects. The only things I really have to define for each step are el and event. el is the part of the UI that will be highlighted. The el attribute accepts the ID of a Webix widget or any common CSS selector. event is the event that shows the next step.
Yet, Hint doesn’t help much without any instructions. For that, I’ll add some text. I can also give a title to a step.
To move from one step to the next by clicking on the focused element or by pressing Enter, you can set event to “click” or “enter” respectively.
view: "hint",
id: "hint",
steps: [
{
el: "div[button_id='grid_vet']",
title: "Meds for Pets",
text: "Click here to look for meds and other goods for your pets",
event:"click"
},
{
el: "toolbar:cart:icon",
title:"Shopping Cart",
text:"Press <b>Enter</b> to view goods in your cart",
event:"enter"
}
]
});
hint.start();
To start a guided tour at once, it would be enough to call hint.start() as I did in the sample above. But I want to delay the tour, say, for 2-3 seconds to show the demo first and only then dim the screen and start the show:
Highlighting Larger Areas
There is a way to highlight some area and make a part of it to work as an action target. For instance, you can highlight a form and make one of the buttons the action target for Hint.
Hint steps have an optional attribute eventEl. If you pass an ID or a CSS selector of an element to it, a click on this element will show the next step. el will be highlighted in this case, and users can do something with it, e.g. change input in text fields.
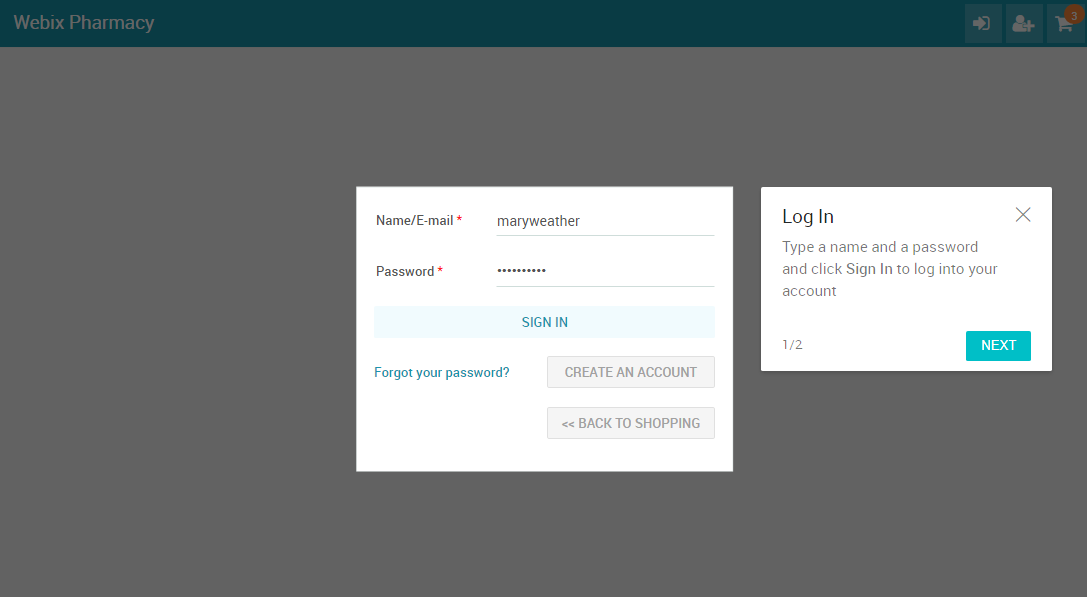
For example, let’s highlight the Sign In form:
view: "hint",
id: "hint",
steps: [
{
el:"sign:form",
title:"Log In",
text:"Click <b>Sign In</b> to log into your account",
event:"click"
}
]
}).start();
Let’s make the Sign In button the element for moving to the next step. I’ll pass its ID to eventEl:
el:"sign:form",
eventEl:"sign",
title:"Log In",
text:"Click <b>Sign In</b> to log into your account",
event:"click"
}
Hint itself does not disable controls in the highlighted area. So I’ll disable those buttons that users shouldn’t click during this guided tour. I’ll use the onAfterStart event of Hint:
view: "hint",
id: "hint",
steps: [
{
el:"sign:form",
eventEl:"sign",
title:"Log In",
text:"Type a name and a password and click <b>Sign In</b> to log into your account",
event:"click"
},
//...
],
on:{
onAfterStart:function(){
$$("sign:create").disable();
$$("sign:back").disable();
$$("cart:back").disable();
}
}
}).start();
I mustn’t forget to enable the buttons when the guided tour is over. I’ll use the onSkip event for that. Hint has also the onEnd event, but it is better to use onSkip, because it is triggered when the tour is closed or finished.
view: "hint",
id: "hint",
steps: [
//...
],
on:{
//...
onSkip:function(){
$$("sign:create").enable();
$$("sign:back").enable();
$$("cart:back").enable();
}
}
}).start();
I’ll also use the onBeforeStart event to begin the guided tour from a certain part of the UI – the Login form.
view: "hint",
id: "hint",
steps: [
//...
],
on:{
onBeforeStart:function(){
$$("signin").show();
},
//...
}
}).start();
You can also highlight larger parts of UI. For instance, you can set padding for the highlighted area around the form:
el:"sign:form",
padding:10,
eventEl:"sign",
title:"Log In",
text:"Click <b>Sign In</b> to log into your account",
event:"click"
}
Hint for Many Views (Pages)
Now I will create a longer guided tour. I want to highlight areas in different views. I need to make sure that views are rendered before the following steps are shown. Steps, as defined in the previous point, may not work correctly. This may happen because Hint steps can be rendered faster than views. And certainly faster than pages or big data are loaded.
There is another related problem. If you use Hint navigation buttons in the previous demo, the guide will freeze or won’t find the element to focus.
A not very nice solution would be to disable navigation buttons. No buttons, no problems:
view: "hint",
id: "hint2",
nextButton:false,
prevButton:false,
...
}).start();
Luckily, there’s a better way. I can tell Hint to perform extra actions or wait for data before showing the next step. For this, I’ll use the next property of steps. next must be a function and it can return a promise if you plan to load big data. After the first step, I just want Hint to wait till the next view is shown:
view: "hint",
steps: [
{
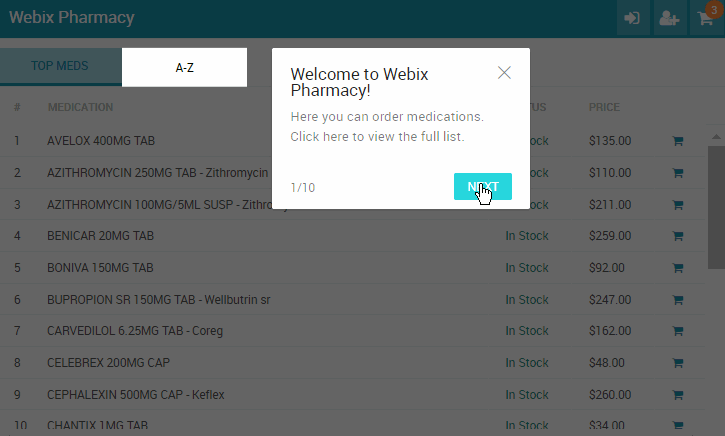
el: "div[button_id='grid_main']",
title: "Welcome to Webix Pharmacy!",
text: "Here you can order medications. Click here to view the full list.",
event:"click",
next:function(){
$$("drug_tabbar").setValue("grid_main");
}
},
//other steps
]
});
To load a big chunk of data between the first and the second step, I can return a promise of data in next of the first step. Every Webix data component has the waitData property, which is a promise object:
el: "div[button_id='grid_vet']",
title: "Meds for Pets",
text: "Click here to look for meds and other goods for your pets",
event:"click",
next:function(){
$$("drug_tabbar").setValue("grid_vet");
return $$("grid_vet").waitData;
}
}
Similarly, I will ensure that the tour won’t break if a user chooses to go back to the previous step by clicking the Previous button. I’ll set the previous attribute of the step as a function that shows the necessary part of the UI:
el: "div[button_id='grid_main']",
title: "Welcome to Webix Pharmacy!",
text: "Here you can order medications. Click here to view the full list.",
event:"click",
next:function(){
$$("drug_tabbar").setValue("grid_main");
},
previous:function(){
$$("drug_tabbar").setValue("grid_top");
}
},
//...
And I can also make sure that the previous step waits for data:
el: "div[button_id='grid_vet']",
title: "Meds for Pets",
text: "Click here to look for meds and other goods for your pets",
event:"click",
next:function(){
$$("drug_tabbar").setValue("grid_vet");
return $$("grid_vet").waitData;
},
previous:function(){
$$("drug_tabbar").setValue("grid_top");
return $$("grid_top").waitData;
}
}
Resuming Hint from Any Step
Hint has one more useful feature: you can resume the tour from any step. This can be useful if you want to show next step or change order of steps depending on the actions of users. This also can be helpful if you want to set Hint events other than a click on the focused area or a press on Enter.
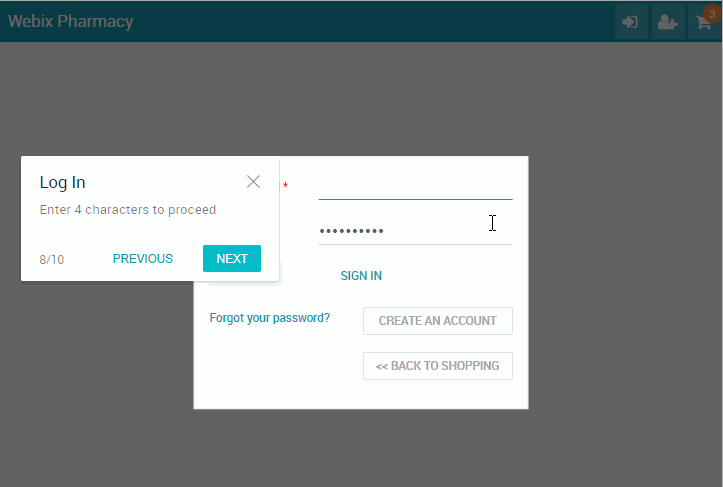
Let’s change the step that shows the Login form. I’ll make the name field work as the action target for Hint. When a user types at least 4 characters, the next step will be shown.
This is the step I want to show first:
el:"sign:form",
title:"Log In",
text:"Enter your name to proceed",
event:"click",
next:function(){
login();
$$("cart").show();
}
}
To resume Hint, I’ll call hint.resume(). resume can take one parameter – the number of a step. Steps are counted from 1. I want to resume the tour from the following step. Hint has a handy method for getting the current step number – getCurrentStep. I’ll use getCurrentStep() + 1 to provide the right parameter for resume.
The guide will be resumed when a user types in 4 characters into the name field:
{ view:”text”, name:”name”, label:”Name/E-mail”, required:true,
on:{
onTimedKeypress:function(){
if (this.getFormView().validate() && this.getValue().length >= 4){
var hint = $$(“hint2”);
if (hint.isVisible()){
hint.resume(hint.getCurrentStep()+1);
}
}
}
}
}
A Few More Words Before You Go
Hint is useful when you want to help users find their way through complex UIs.
I’ve shown you basic Hint usage and other features of the widget, like adding actions between steps, and resuming the tour from any step.
Download Hint from GitHub and read the documentation for more details. Feel free to drop us a line in the comments.


