Native applications are increasingly replaced by their Web analogues. More and more companies are developing cross-platform products and services, and you can do the same with Webix. The powerful javascript widgets library is capable of repeating any interface and, to prove this, let’s replicate Windows 10 interface in a web application.

Our goal is to create a shell that will provide a desktop-like environment where users can access the remote data and work with it. They should be able to launch the inner apps, organize them on the screen, switch between them, etc. And it should work in most browsers including IE8.
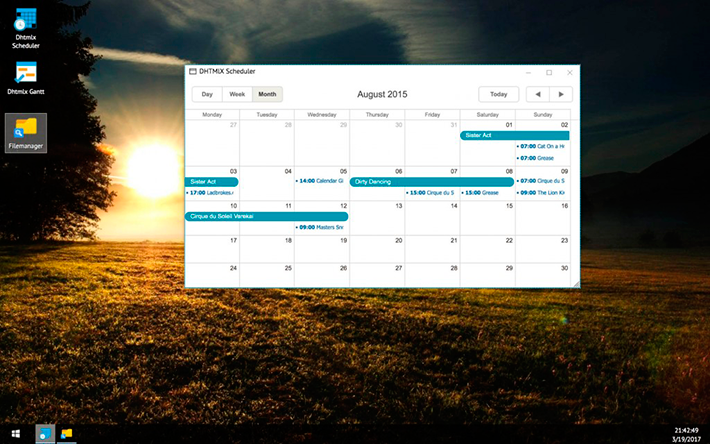
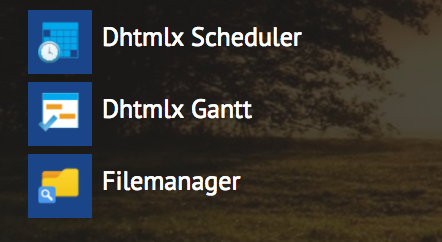
We will use only free Webix Standard edition to develop the shell. To demonstrate particular applications we will use such commercial products as DHTMLX Scheduler, DHTMLX Gantt (Webix provides integrations for these products) and File Manager.
For our Windows 10 application we will need to implement the following UI:
- Desktop with application icons
- Taskbar
- Start menu
- Icons to minimize and open apps in taskbar
- Popup windows to launch the applications
Before studying the DIY guidelines,you can check the live demo and browse the source code to keep up with the the code listings.
Structuring the Application
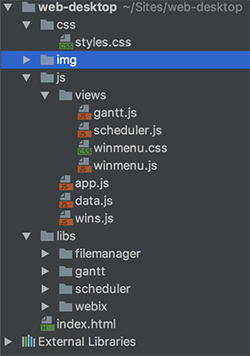
Let’s structure out project:
- css – folder for stylesheets
- img – folder for images
- js – folder for Javascript files
- libs – folder for libraries (Webix UI, FileManager, DHTMLX Gantt, DHTMLX Scheduler)
To get started, you need to download the free version of the library (license “GNU GPLV3”). Then you need to copy the “codebase” folder from the package and place it into the project’s folder with the libraries (“libs/webix/”).
The same action should be performed with other dependencies we need to use in our project.
Now let’s create the “index.html” file in the root directory.
<script src="libs/filemanager/codebase/filemanager.js" type="text/javascript"></script>
<script src="js/views/scheduler.js" type="text/javascript" charset="utf-8"></script>
<script src="js/views/gantt.js" type="text/javascript" charset="utf-8"></script>
<script src="js/app.js" type="text/javascript" charset="utf-8"></script>
<script src="js/wins.js" type="text/javascript" charset="utf-8"></script>
<script src="js/data.js" type="text/javascript" charset="utf-8"></script>
Webix Desktop App
<script type="text/javascript" charset="utf-8">
desktopApp.init();
</script>
As you can see, we have included Webix JS and CSS files as well as FileManager, Gantt and Scheduler files.
Let’s proceed with the “js” folder and create the main application files:
- “data.js” – a file with test JSON data for widgets;
- “app.js” file – the main file that contains the structure and logic of our application;
- “win.js” – a file with application windows.
Main Application Blocks
The “app.js” file houses the desktopApp object that contains initialization code and declares all the helper functions we need:
desktopApp = {
init: function(){
webix.codebase = "./";
this.createLayout();
this.createToolbar();
this.startTime();
this.createMenu();
},
createLayout:function(){...},
createToolbar:function(){...},
startTime:function(){...},
createMenu:function(){...},
signIn:function(){...},
signOut:function(){...},
//other functions
}
The main application layout is defined by the createLayout function which creates a Multiview with the main and login screens that are shown and hidden in turn when a user logs in and out.
For the main screen we will use the Layout and List widgets which are styled to correspond to the real desktop.
webix.ui({
id: "screens", animate: false,
cells:[
{
view:"layout", id: "main",
css:"desktop-layout", type: "clean",
cols:[
{
view: "list", css:"desktop-items", on: {
onItemDblClick: desktopApp.wins.showApp
}},
{}
]
},
{ id: "sign-in", css: "sign-in", rows:[ /* log in form elements*/] }
]
});
}
The taskbar is located below the main layout. Normally, it is visible most of the time, but it can be hidden when a user enters the fullscreen mode. So, we will separate it from the main app and initialize it with another webix.ui() call.
For the taskbar we will use the following widgets: Toolbar, Button to imitate Windows start button, and Template to render current date and time.
createToolbar: function(){
webix.ui({
view:"toolbar",id:"toolbar", css:"toolbar-bottom",
cols: [
{
view: "button", id: "start_button",
type: "image", image: "img/start.png",
on: {
onItemClick: function () {
if ($$("winmenu").config.hidden === false) $$("winmenu").hide();
else $$("winmenu").show();
}
}
},
{},
{ view:"template", id:"time", width:75, css:"time-template"}
]
});
}
Creating Windows-like menu
As a part of the command menu, we will take the ready-made Webix Winmenu widget that comes from repository of custom widgets and can be used under GPL license. We need to download it and place the “winmenu.js” and “winmenu.css” in the “js /views” folder of our project.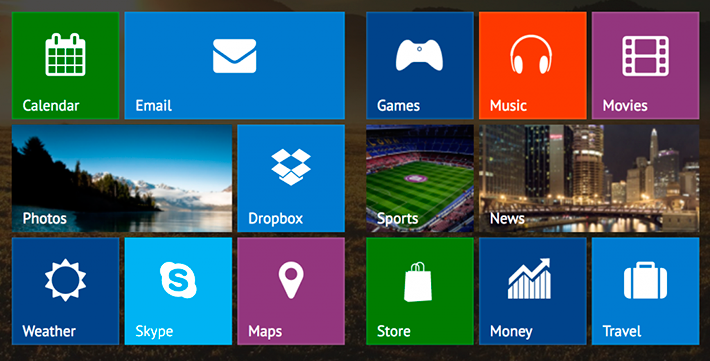
Apart from the Winmenu we will use such standard widgets as Popup, Layout, Template, Label and List:
createMenu: function(){
webix.require("/js/views/winmenu.css");
webix.require("/js/views/winmenu.js", function(){
webix.ui({
view:"popup", id:"winmenu",
hidden:true, css:"winmenu",
body: {
cols:[
{ /* left part */},
{ /* first winmenu*/},
{ /*second winmenu*/}
]
}
});
});
}
Let’s have a closer look at the widgets.
-
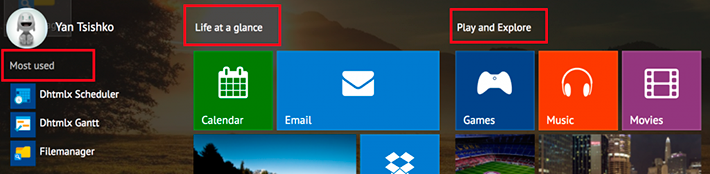
- User information is rendered with the help of a Template widget:

template:"
<div><img class="user-logo" src="img/user_logo.png" /> Yan Tsishko</div>
" }
-
- To display the headers of menu sections we used the Label widget:
- To display the headers of menu sections we used the Label widget:
...
{ view:"label", css:"start-image-menu-title", label: "Life at a glance", height:60}
...
{ view:"label", css:"start-image-menu-title", label: "Play and Explore", height:60 }
-
- The List widget was used to show the list of installed programs. We need to catch its “onItemClick” event to open the corresponding application and hide the menu:
template:"
<div class="desktop-icons start-menu-item">"+
"
<div class="start-menu-item-image-bg">”+
"<img class="start-menu-item-image" src="#image#" /></div>
"+
"
<div class="start-menu-item-image-title">#title#</div>
</div>
",
data:webix.copy(startmenu_icons),
on:{
onItemClick: function(id){
desktopApp.wins.showApp(id);
$$("winmenu").hide();
}
}}
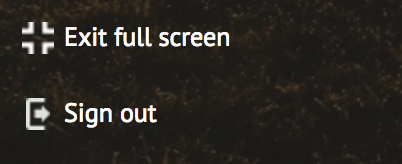
The List widget is also used for bottom menu items:
template: function(obj){
var icon = "image", value = "value";
if( obj.state){
icon += obj.state;
value += obj.state;
}
return "
<div class="menu-sys-icon" style="background-image: url('+obj[icon]+');"></div>
"+obj[value];
},
type:{ height:36 },
select:true,
data:[
{id: "full-screen", value: "Full screen"},
{id: "sign-out", value: "Sign out", }
],
on:{
onItemClick: function(id){
$$("winmenu").hide();
if(id == "sign-out") desktopApp.signOut();
else if(id == "full-screen") /* enter fullscreen mode*/
}
}
}
-
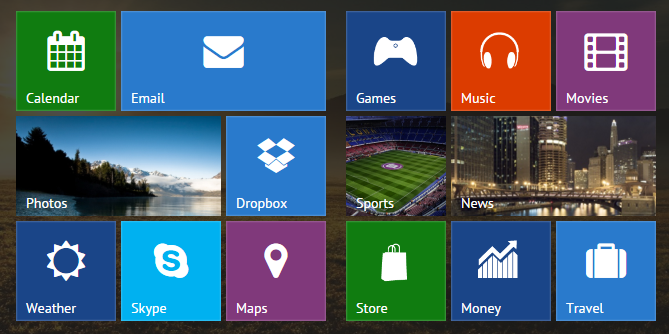
- And, finally, the colorful Winmenu widget is used for graphical menu items:
onItemClick: function(id){
desktopApp.wins.showEmptyApp(this.getItem(id));
} },
data:[
{ value:"Calendar", id: "calendar", icon:"calendar", $css: "green" },
{ value:"Email", id: "email", icon:"envelope", $css: "blue", $gravity:2},
{ value:"Photos", id: "photos", img_full:"img/photos.png", $gravity:2, $css: "navy", icon:"image" },
{ value:"Dropbox", id: "dropbox", icon:"dropbox", $css: "blue"},
{ value:"Weather", id: "weather", icon:"sun-o", $css: "dark-blue"},
{ value:"Skype", id: "skype", icon:"skype", $css: "light-blue"},
{ value:"Maps", id: "map", icon:"map-marker", $css: "violet"}
]
}
Implementing Application Windows
To avoid the spaghetti code, we separated the handling of application windows and moved it to the “wins.js” file.
We used the standard Window widget for the application windows. Its head displays the application name alongside with minimizing, maximizing and closing icons, while the window itself can be moved and resized, which is achieved via the related settings.
Each time a user clicks on the application icon on the desktop, the window with the corresponding application in its body shows up:
showApp: function(name){
var config = desktopApp.wins.ui[name];
webix.ui({
view:"window", id: winId,
css:"popup-window-custom app "+config.css||"",
position: desktopApp.wins.getPosition,
resize: true, move:true,
height:450, width:800,
head: desktopApp.wins.ui.toolbar.apply(this,config.toolbar()),
body: config.body(),
on: config.events
});
}
At the same time we need to render the application icon on the taskbar between the start button and the “date/time” part. So, we call the Toolbar’s addView() method, which allows us to dynamically initialize a widget within an existing layout.
var btn = webix.ui({
view:"button", css:"toolbar-icon",
type:"htmlbutton", label: template,
width:40,
on:{
onItemClick:function(){ /* show the window*/}
}
});
$$("toolbar").addView(btn,pos);
Conclusion
As a result, we got a cross-platform web application for rendering a desktop-like UI by using Webix GPL functionality only. Its live demo and source code are available on Github.
As you can see, the creative mind and coding skills let anyone implement smart and bright solution without paying a penny. But please note that according to the GPLv3 license you must provide the source code of your application to your users and allow them to modify it.
For non-open source solutions you need to obtain the commercial license for the UI library. Webix Commercial (PRO) edition features numerous bonuses and powerful functionality, apart from being paid 🙂
And, please, do remember that there are a lot of free handy widgets and integration patterns outside of the main package, in the Components repository. If you feel that you can contribute by a nice widget, you can make a pull request and after our review it may be included into the repo.


