I guess, the master-details pattern needs no special introduction for practised web developers who create business apps that work with users, sales and such. Nearly any real life app has such a relation model and demands clear and easy navigation and inspection of information. Whether you plan to develop an email app, an address book, an RSS reader, a CRM, a social net app or any other app that is based on a list-details layout, the master-details pattern is a relevant solution.
Webix UI Library provides a number of ways to implement this technique: from simple to more complex, from pretty awkward to really handy ones. I’ll demonstrate them all while creating a mock email management app, and at the end of it all, you’ll see the most efficient, reliable and good-looking solution. Well, without further ado, let’s get down to the details of our master plan.
Why Use the Pattern?
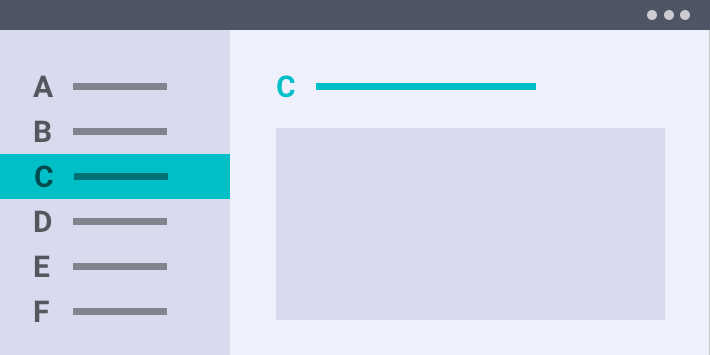
The concept of the master-details pattern is pretty easy to grasp. The app designed according to it has 2 views: a master view (usually a list or a grid) and a details view for content. When an item in the master view is selected, the details view is updated accordingly.
The master-details pattern is very useful because it allows your end-users to:
- manage a collection of complex content (lists of contacts, products, etc.)
- quickly edit and remove items
- switch between items frequently and stay in the same context (e.g. email apps)
There are 2 styles for implementing the pattern:
- the stacked style (only one view is visible at a time: the master or the details; good for small screens);
- the side-by-side style (the master view and details views are visible at the same time; good for bigger screens).
I will show you how to implement the pattern according to the second style. I’ll focus only on the pattern itself and won’t go into other aspects.
Sub-views in a Grid
First, guys, I’ll show you how to how to render nested data using subviews in Webix DataTable. Let’s create a datatable and populate it with inline data:
view:"datatable", columns:[
{ template:"{common.subrow()}", width: 40},
//other columns
], on:{
onSubViewCreate:function(view, obj){
view.setValues(obj.person);
view.config.masterId = obj.id;
}
}, subview:subview,
pager:"pagerU",
data:emlist,
autoheight:true, scroll:false
};
//a pager for better navigation through the datatable
var pager = { view:"pager", id:"pagerU", size:5 };
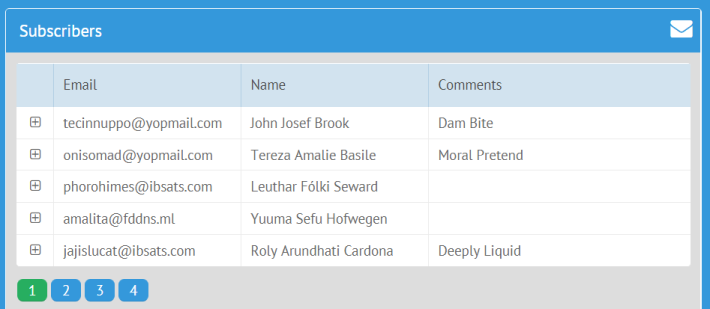
As you can see, the first column of the datatable contains a button for opening a subrow, that will contain the details for a particular row of the datatable. For this purpose, I defined an event handler that will push the relevant data into the subrow, which in this case contains a form. Let’s look at the form:
view:"form", elements:[
{ margin:20, cols:[
//input controls
]},
{ align:"right", inputWidth:100, view:"button",
value:"Save", click:function(){
var form = this.getFormView();
var values = form.getValues();
var grid = form.getMasterView();
var id = form.config.masterId;
grid.updateItem(id, { person: values });
grid.closeSub(id);
}},
actions
]
};
The form, beside the input fields and a table with actions, has the Save button, which updates the data in the master datatable with the input data from the form.
Now I add a toolbar:
view:"toolbar", cols:[
{ view:"label", label:"Subscribers" },
{ view:"icon", icon:"envelope" }
]
};
and I am ready to initialize the UI of the email list.
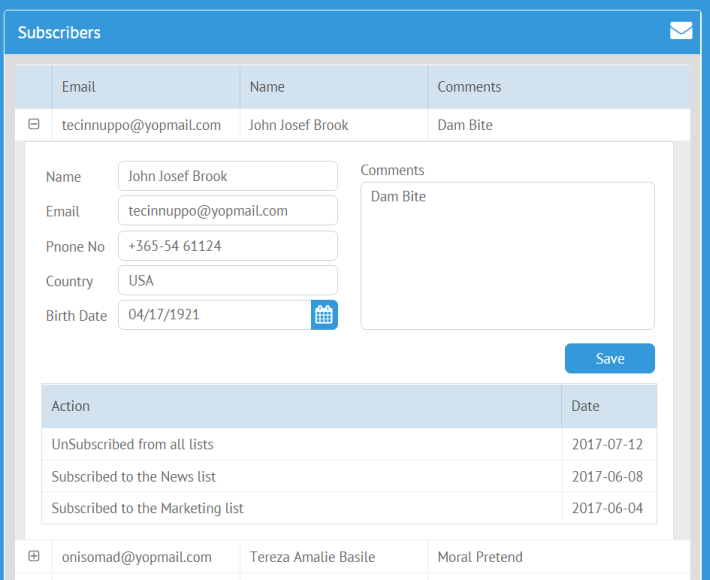
So far so good. The solution is simple and does the trick, but the opened subviews take a lot of your screen space, and the datatable gets longer and longer.
Details as a Popup
To avoid making your datatable as long as Rapunzel’s hair, you can move all the details to a popup.
For that, I’ll add a different event handler to the master datatable:
view:"datatable", columns:[
{ template:"", width: 40},
//other columns
], onClick:{
"fa-cog":function(ev, id){
$$("details").show(ev);
var view = $$("details").getBody();
view.setValues(this.getItem(id).person);
view.config.masterView = this;
view.config.masterId = id;
}
},
//other unchanged code
};
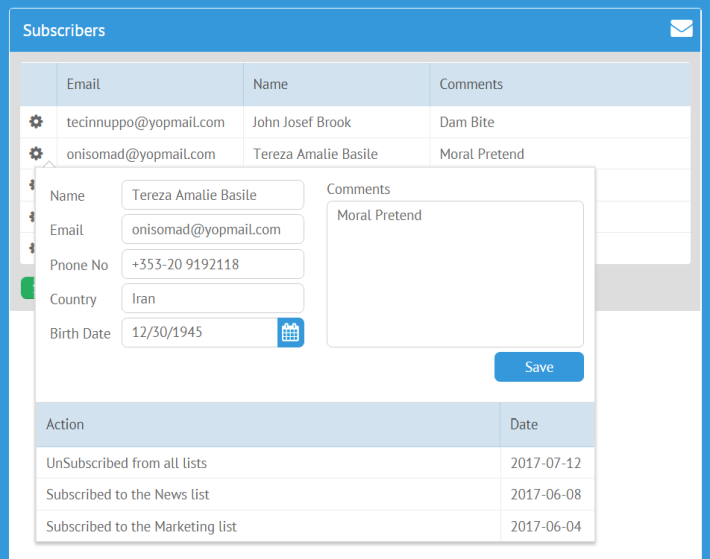
This time, the first column of the master view contains icons for showing popups with the details. The popup will contain the same dear old form, though I moved the controls to a variable. This will help to make the code look better and to style the form:
{ margin:20, borderless:true,
cols:[
...//input controls
},
{
align:"right", inputWidth:100, view:"button",
value:"Save", click:function(){
...//unchanged code
grid.updateItem(id, { person: values });
form.getParentView().hide();
}
}]
};
webix.ui({
view:"popup", id:"details", minWidth:200, maxWidth:600, padding:0,
body:{
view:"form", padding:0, elements:[
fields,
actions
]
}
});
This solution is as simple as the previous one and doesn’t waste the screen space. However, as a popup is easy to close, a single twitch of your hand can bring on a disaster — and say goodbye to your unsaved input. Moreover, the position of a popup is relative so it will block the next item you want to open. Let’s fix it.
Side Panel
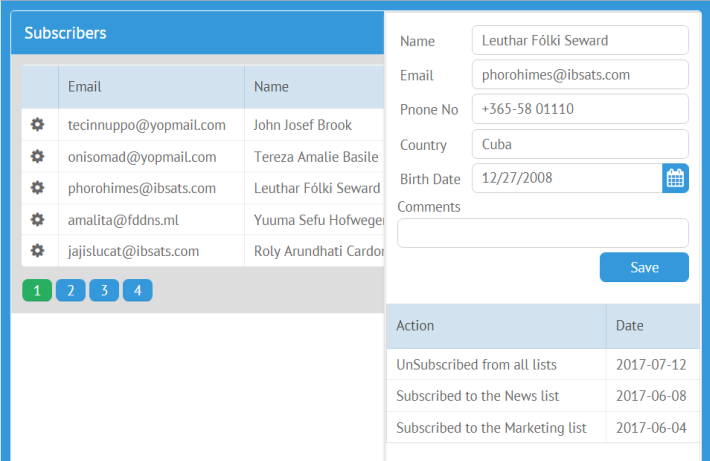
Let’s perfect our app. First, I will slightly change the event handler, so that the position of the popup would be the same every time:
view:"datatable", columns:[
//columns
], onClick:{
"fa-cog":function(ev, id){
$$("details").show(); //delete the ev parameter
//unchanged code
}
},
//unchanged code
};
Next, I’ll change the event handler for the Save button in the details form:
...//input controls
{ align:"right", inputWidth:100, view:"button",
value:"Save", click:function(){
...//unchanged code
form.hide();
}}
]};
and add the last stroke to fixing the position of the popup:
view:"popup", id:"details", padding:0,
position:function(state){
state.width = 340;
state.left = state.maxWidth - state.width;
state.top = 0;
state.height = state.maxHeight;
},
body:{
... //same body
}
});
Okay, this solution is pretty good, but you might have a few questions:
- Why use icons, if we can click records to open details?
- What if I do not want the popup to block the view of the datatable?
Here’s the answer, my dear friends, here’s the answer. Instead of a popup, I will create a hidden form, that will appear every time a user selects a row in the datatable.
First, let’s enable selection for the master datatable, change the size of its columns and change the event handler accordingly:
view:"datatable", select:"row", columns:[
{ id:"email", header:"Email", template:"#person.email#", sort:"text", fillspace:1 },
{ id:"name", header:"Name", template:"#person.name#", fillspace:1 },
{ id:"comments", header:"Comments", template:"#person.comments#", fillspace:2 }
], on:{
onAfterSelect:function(id){
$$("details").show();
var view = $$("details");
...//unchanged code
}
},
//unchanged code
};
Next, let’s replace the popup with a hidden form:
id:"details", hidden:true, minWidth:200,
view:"form", padding:0, elements:[
fields,
actions,
{}
]
};
Now I can initialize the UI.
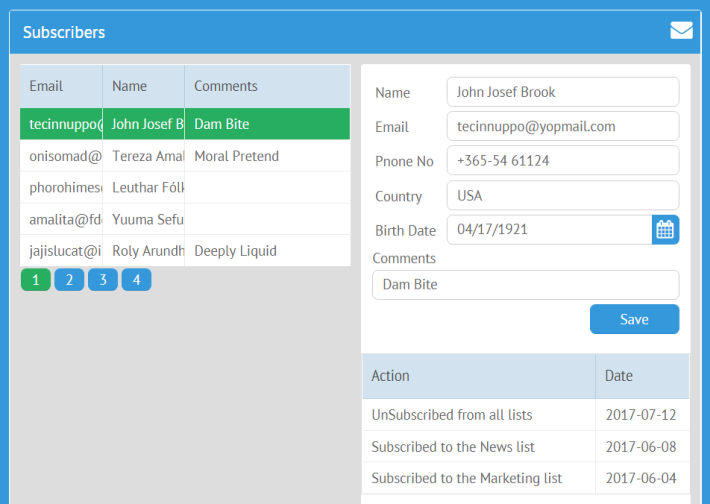
This is the optimal solution, as it both works well and looks good. In case you want to have the best result and have time for it, dive into the next example.
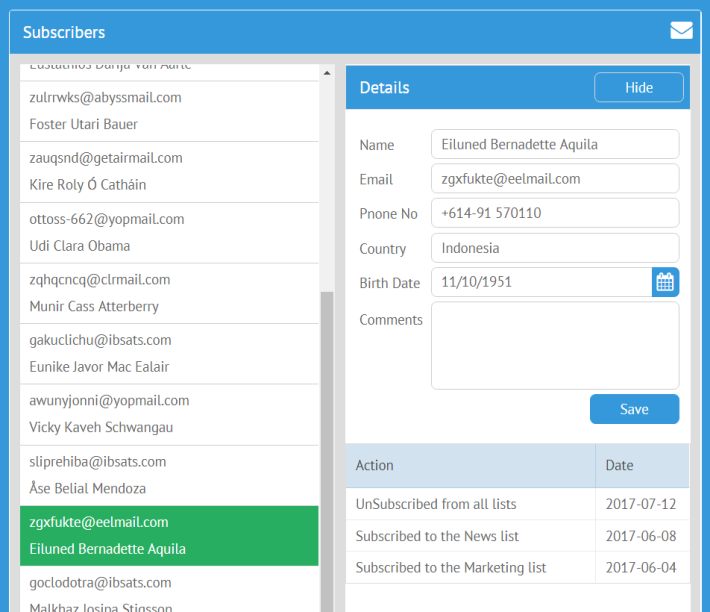
Custom View
If you don’t really fancy the way the master datatable looks like after the form is shown, it’s not a problem, as you can completely change the master view. I will replace the datatable with a list.
First, let’s change the master datatable a bit:
view:"datatable", id:"master", select:"row", columns:[
//columns
], on:{
onItemClick:function(id){
$$("details-view").show();
$$("details-list").select(id.row);
...//same four lines of code
}
},
//other unchanged code
};
Note that this time the event and its handler are different: it’s going to make a list with details visible. Let’s have a look at this mysterious list:
view:"list", select:true, id:"details-list", item:{
width: 320, height:65
}, template:"#person.email##person.name#", on:{
onItemClick:function(id){
var view = $$("details");
view.setValues(this.getItem(id).person);
view.config.masterId = id;
}
}
};
A click on an item from the list will populate the form with the data from the same dataset.
Next, let’s enhance the details form with a toolbar, that will contain a button for switching back to the master view without saving the input:
id:"details",
view:"form", padding:0, minWidth:200,
elements:[
{ view:"toolbar", cols:[
{ view:"label", label:"Details" },
{ view:"button", value:"Hide", width:100, click:function(){
$$("master-view").show();
}}
]},
{ padding:10, rows:fields },
actions,
{}
]
};
Finally, let’s put everything together again:
rows:[
toolbar,
{
type:"space", rows:[{
animate:false, cells: [
{ id:"master-view", margin:5, rows:[ grid, pager, {} ] },
{ id:"details-view", margin:10, cols:[list, details] }
]
}]
}
]
});
$$("details-list").sync($$("master"));
I’ve put the master and the details view into a multiview (this isn’t stated directly, but whenever you specify cells, not rows or cols, Webix knows that you mean to create a multiview). I’ve disabled the animation effect, but if you want to have it, don’t set the animate property at all. Finally, I’ve synced the master datatable and the details list.
Nesting: Sane and Not Really Sane Use-Cases
Apart from using the master-details pattern for quite normal apps, you can try to create vast hierarchies of nested views, like this:
And who knows, maybe you will surpass Quintus Teal, and we’ll slip into the fourth space dimension through the UI of your app.
Conclusion
The master-details pattern is great for nearly any real-life app that works with lists of clients, products, etc, easy to master and implement. However, the devil’s in the details. You’ve seen how, by changing the latter, we moved from quite awkward and fragile apps to something more and more useful; how we perfected the app and, finally, plunged into a bit of insanity.


