WEBIX GRID IS HERE! LAUNCH OFFER: Read More 20% Off all Webix Grid licenses. Valid August 4 – September 3.

WEBIX BLOG

Highlight your company with Webix

Hi, everyone!

They say that Monday is a tough day. We say that Monday is a right time for new beginning. That is why today we decided to start our new project, in which everyone, who deals with Webix, can participate.

Highlight your company with Webix


I think, you will agree that before you buy a product or a service, it would be cool to read the reviews of people who have already used it. And if we are talking about building applications, it would be nice to see real cases that have already been created. That is why every week in our blog we will publish an article that describes a real use case which was made with Webix by our customers.

Everyone, who has a product or an application made with Webix library! If your project is not internal, confidential or private, and you want to share it publicly and highlight your company in our blog – my email is open for your cool articles.

What we expect to get: a full description of your product, for what purpose and for whom it was developed, 3-5 screenshots, as well as the information about your company (link to the website or your blog, your company’s name and the name of the product), and any additional information you want to share.

By the end of this year we will publish all the articles. Then we will choose the most interesting application or solution based on Webix JavaScript UI library and announce the winner.

Hurry up, maybe exactly your app is the most interesting one!

Working with nested data in Webix UI

We all like to use simple apps where an interface is easy and straight. Creating such apps is a breeze, just put some HTML tags, add a UI framework of your choice, something like Bootstrap, for example, and the app is ready.

In real every-day development, things are bit different. It is common for a business app to work with complex data, that requires some advanced UI to represent it. A nested data is one of such use-cases. There is no a ready to use solution to show such kind of data in raw HTML or in Bootstrap. For such kind of task, you need a more powerful tool. Something like Webix UI.

Webix has also developed an in-house solution for managing large volumes of aggregated data in business web apps: the JavaScript Pivot Table. This tool analyzes and displays data in a tabular format.

Tree

The simplest widget that can be used to show nested data is a Tree. It is common UI element for desktop apps, but still rare in web apps. Webix Tree has all common functionality of tree widget; it allows to represent the hierarchical data as a tree, where branches can be expanded or collapsed. Additionally, Webix Tree is really fast. It renders thousands of items in less than 1 second. And if that is not enough, you can utilize a dynamic loading feature to load data on demand.

webix.ui({
view: "tree", data: nested_data
});


Webix Tree

Webix Jet – a better way to build web apps

Making a web application should be easy.

While developing Webix, we have tried to create components that simplify the development of web applications. Fast, clear, customizable; Such are the components we needed for our projects.

However, it was not enough. Every time we were developing new applications, we invented new solutions about how to keep the code, how to organize navigation, how to work with the server-side code and lots of other boring tasks. After a while, we decided that enough is enough. Eventually, all the best practices for developing on Webix were combined into a micro-framework. So, that’s how Webix Jet was born.

webix jet micro framework


What is Webix Jet

Webix Jet is a micro framework for a single-page application. As you probably know, Webix is a library of diverse and separate UI components. Webix Jet is a framework which allows you to combine and reuse them all and to create and develop your perfect app with minimal code footprint and without stress.

It is very light in weight (less than 10 kb of code ), works with any back end (NodeJs, PHP, .Net ) and can be used for both Desktop and Mobile apps.

Path to Webix 4.0

You may already be aware of the release of Webix 3.0 only one week ago with more new cool features. That doesn’t mean that we are going to rest on our laurels. What it means is that we have already started working on the next Webix update.

Webix roadmap


To tell the truth, not all features that were planned for version 3.0 were included in the final release. We were a bit over-optimistic with our previous estimates. Nevertheless, features missing in version 3.0 have not been discarded and will be included in our next updates.

Webix UI

Version 3.1 (the date of release is the end of November) will contain the long-expected side-menu component and auto-sizing functionality for menu and buttons (that is mandatory for any multilingual app).

What is more, the next version will have layouts with absolute float positioning and data-map component that will allow you to visualize complex data similar to the next:

Webix 3.0: Webix Jet, Visual Designer, New functionality

Now September is in its most colourful phase and we are happy to present our powerful updates. Today we want to highlight a release of Webix 3.0 that adds two absolutely new ways to build a Webix based app and new features, which are unique, and can’t be found in any other HTML frameworks.

Webix 3.0


Let’s start with 2 major updates.

Webix Jet – framework that works

Webix UI helps you to create apps faster by providing rich widgets. Still the whole app is more complex than just a set of widgets. Developers also need to arrange their code nicely as well as solve such tasks as app routing, state saving, code re-usage and etc. To cover all above concerns, we are introducing micro framework Webix Jet as part of the release. It will definitely save your time and efforts.

Coming Out: Webix Update 3.0

Hey everyone!

September 22 – mark the date in your calendar, because exactly on this day we will be glad to present our new major update – Webix 3.0. As autumn is a start of a working year, we decided to start it with a big upgrade.

Webix 3.0


What September 22 will bring:

  1. Webix Jet – a micro framework on top of Webix UI, which will allow you to combine and reuse all of diverse and separate UI components, and to create and develop your perfect app with minimal code footprint and without any stress.
  2. Visual designer – a tool for creating UI by drag and drop.
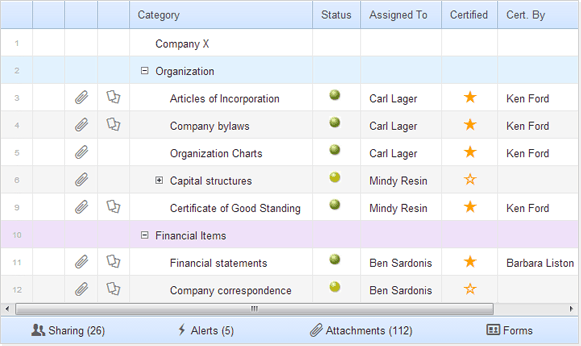
  3. New, even more powerful functionality for grids: Sub-rows, Sub-grid, Sub-form.
    a) ability to show really complex data in the datatables
    b) nested tables
    c) master and slave data in the same table
  4. Import/Export to PNG and Excel – no longer need to take screenshots or start separate tables. It definitely simplifies tasks’ solving and saves your time.

As usual, we have something to share.

Stay tuned and see you next week!

Share it with your friends and get +3.0 to your karma!

How to Build a Mega Menu with Webix

Unlike the regular menus that you can create using the Menu Component, Mega Menus are big and wide enough to allow you place other components and widgets within them. Such a type of menus is widely used on the online shopping websites since it’s pretty easy to use them for navigation purposes.

Here’s an example of how this menu works:

Mega menu built with webix

The demo of the final mega menu with its source code is here.

In this article, we’ll create our own mega menu with Webix in a few easy steps.

Tuning Webix for Odata

As we know, web app development is a complex process that, on the one hand, consists of laborious work at the backend and, on the other hand, includes plenty of efforts while creating a nice-looking and responsive UI.

If you want to optimize the construction of your web applications, you need to find the best option for organizing your work with data as well as a fast and powerful js library for drawing app interface.

This variant can be implemented by using OData, an open data protocol for building RESTful API’s, and by adapting Webix UI library to its rules of requesting and modifying data.

Odata protocol

OData’s goal is to enable a broad access to data regardless of the way it is stored. It allows requesting and updating resources via HTTP commands and provides an entire query language directly in the URL.

Well, if you are reading this post, you probably know a lot about Webix. If suddenly no, you can find more info here.

Meet the Updated Webix Skin Builder

Right after the release of Webix 2.5 we’ve updated our online developer tool Webix Skin Builder. Since this upgrade, it has an built-in Material skin and small UX enhancements.

For those who haven’t used Skin Builder yet, we’ll explain the practical use of this handy designer tool. It allows creating custom skins for the UI of your web apps as well as provides you with the existing set of skins.

Material Skin

When we’ve firstly announced the possibility to apply the Material skin to your web app built with Webix, the skin wasn’t included into the library package. To download it you had to go to the special github.com repository and take the skin there. Now this skin is available right from our Skin Builder tool.

Webix Skin Builder

Webix Skin Builder will also delight you with an improved UI. Just check it to be sure that it works and looks better.

Customizing Kanban Board. Complex Structure and Swimlanes

Kanban boards allow visualizing the workflow in an easy and intuitive way. And Webix has a tool that allows you to create your own Kanban Board.

There’s already a well written guide that describes how you can use the Webix Kanban Board widget. This time we’ll take a look at some tips and tricks you can use to customize the existing project management application.

Splitting the Columns

First of all, the basics. Here’s how you can create a simple Kanban Board:

webix.ui({
    view:"kanban",
    type:"space",
    //the structure of columns on the board
    cols:[
        { header:"To Do",
          body:{ view:"kanbanlist", status:"new" }},
        { header:"Estimated",
          body:{ view:"kanbanlist", status:"estimated" }},
        { header:"In Progress",
          body:{ view:"kanbanlist", status:"work" }},
        { header:"Done",
          body:{ view:"kanbanlist", status:"done" }}
    ],
    //URL to the file with data collection
    url: "tasks.php"
});

And here’s the result:

Basic Kanban Board

1 24 25 26 27 28 33