With Webix UI library you can export any tabular app data into a PDF file. The recent Webix 6.2 offers even more capabilities regarding this feature. Now you can save views as images, format data specifically for the report, place several widgets into one PDF file, and enjoy many other useful functionalities. Make sure you haven’t missed any long-awaited updates.
- Export widgets as they are
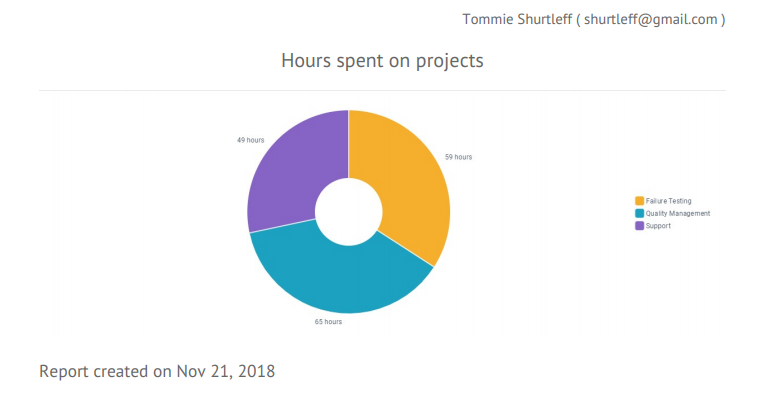
This feature is valuable when it comes to the export of Chart and even non-data components such as Form. A bright widget doesn’t have to turn into a plain table anymore. You can choose an appropriate export display mode for it:
-table (default, exports a table with data)
-image (screenshot, exports widget’s visual representation)
-all (exports both)
- Add several widgets to a single report
Forget about generating numerous separate PDF files one by one. Now you can download all widgets by a single action. For this, you need to provide the IDs of the necessary widgets as an array:
Note, you can set shared export options for both widgets like in the example below.
It is also possible to set the parameters for each widget individually.
{ id:"datatable" },
{ id:"chart", options:{ display:"image" }}
]);
- Specify data for export
Say you don’t want all the displayed app data in your report. Now you can determine columns or rows you would like to see in the exported file.
- Specifying columns
You can leave the columns which you don’t need out of the export PDF file using the ignore property.
webix.toPDF($$("data"), {
ignore:{ id:true }
});
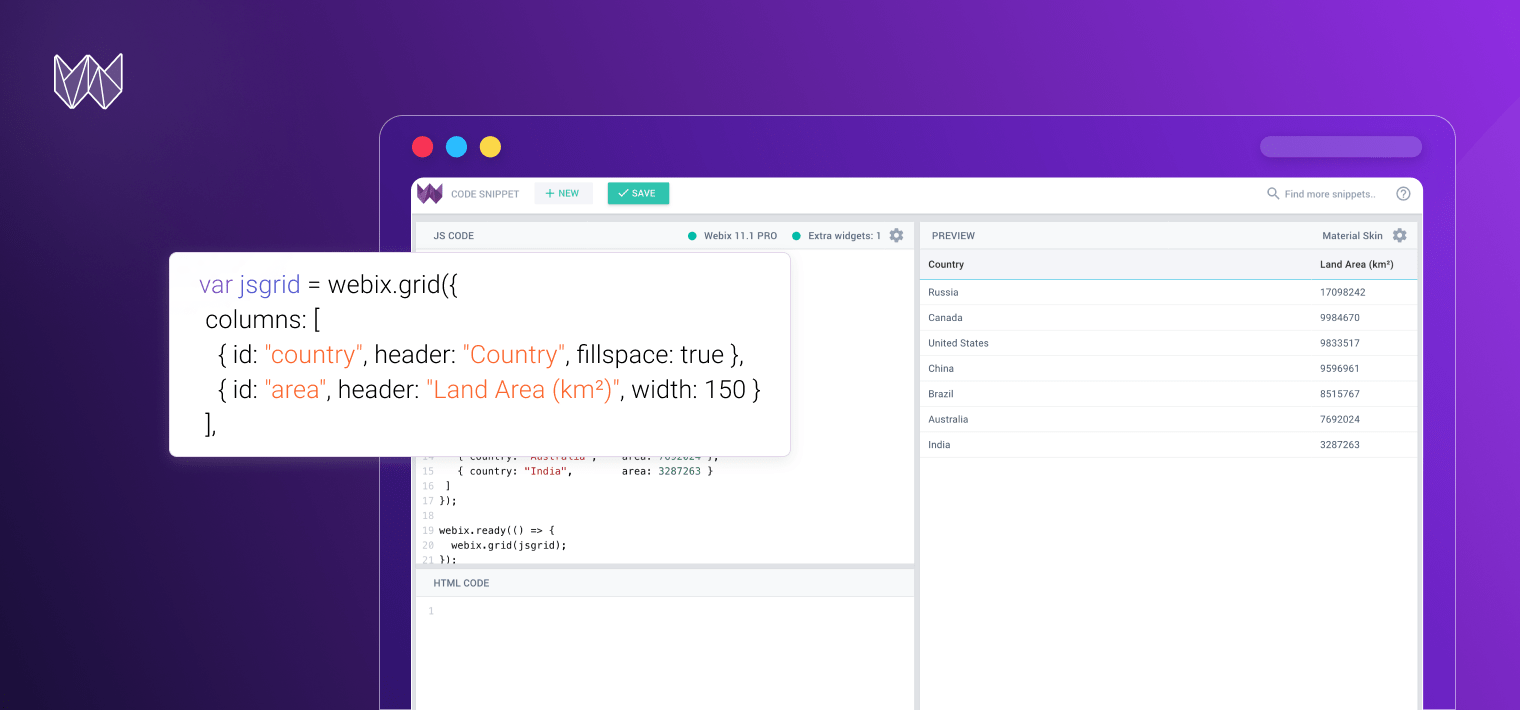
You can also determine the array of columns and set the parameters for all or just some of them. If you want to get the default parameters, you should specify only the column’s id (see the “year” column).
columns:[
{ id:"rank", width:40, header:"Rank" }, // a column that wasn't rendered in datatable
{ id:"year" }, // column will be exported as it is
{ id:"title", header:"Top movies", width:300 } // custom configuration of a column
]
});
In addition, there are several ways of presenting tree data in the export table: you can either divide the hierarchy into separate columns or just mark the tree levels with hyphens. To see how it works, try the export feature in the following example.
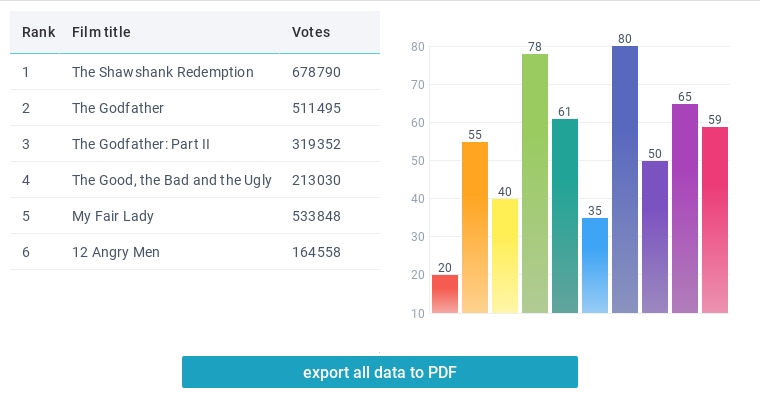
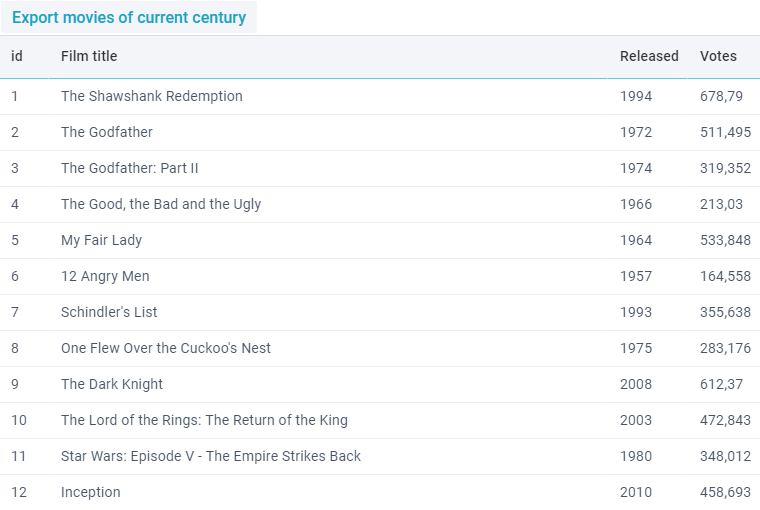
- Specifying rows
A piece of code below shows how to export the rows that fit your requirements and certain terms. As a result, we filter out the movies that do not belong to the current century.
filter:function(obj){
return obj.year >= 2000;
}
});
- Format data for the report
In Webix 6.2 you can provide a pattern for modifying a widget data for any exported file. It doesn’t matter whether it is PDF, Excel or CSV. With the help of a data scheme, you can define the $export key to alter the data as you need, e.g., correct the format of a specific cell or export a fully custom data record based on the existing fields.
view:"list",
scheme:{
$export:function(obj){
return { value:obj.value, date:webix.i18n.parseFormatStr(obj.date) };
}
}
});
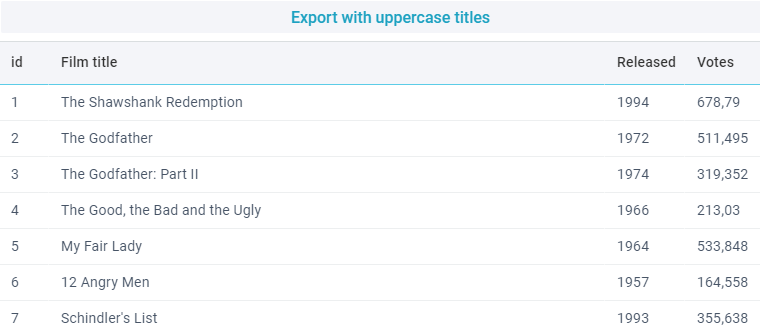 App data
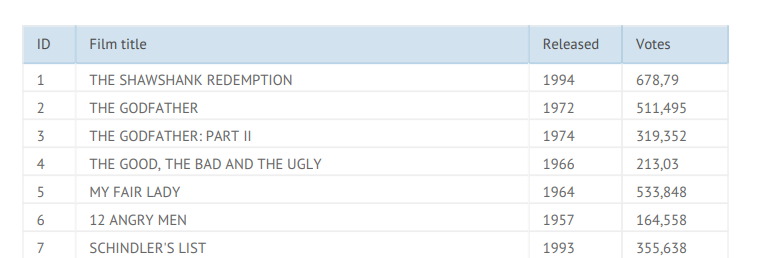 Modified PDF data with uppercase titles
- Add a company watermark
You can also add a company watermark or a general title to PDF reports using the docHeader or/and docHeaderImage settings. As a result, every page of the exported document will be labelled with a company’s name.
docHeader: "Project X, March 2019",
docHeaderImage: "../common/projectx_logo.png"
});
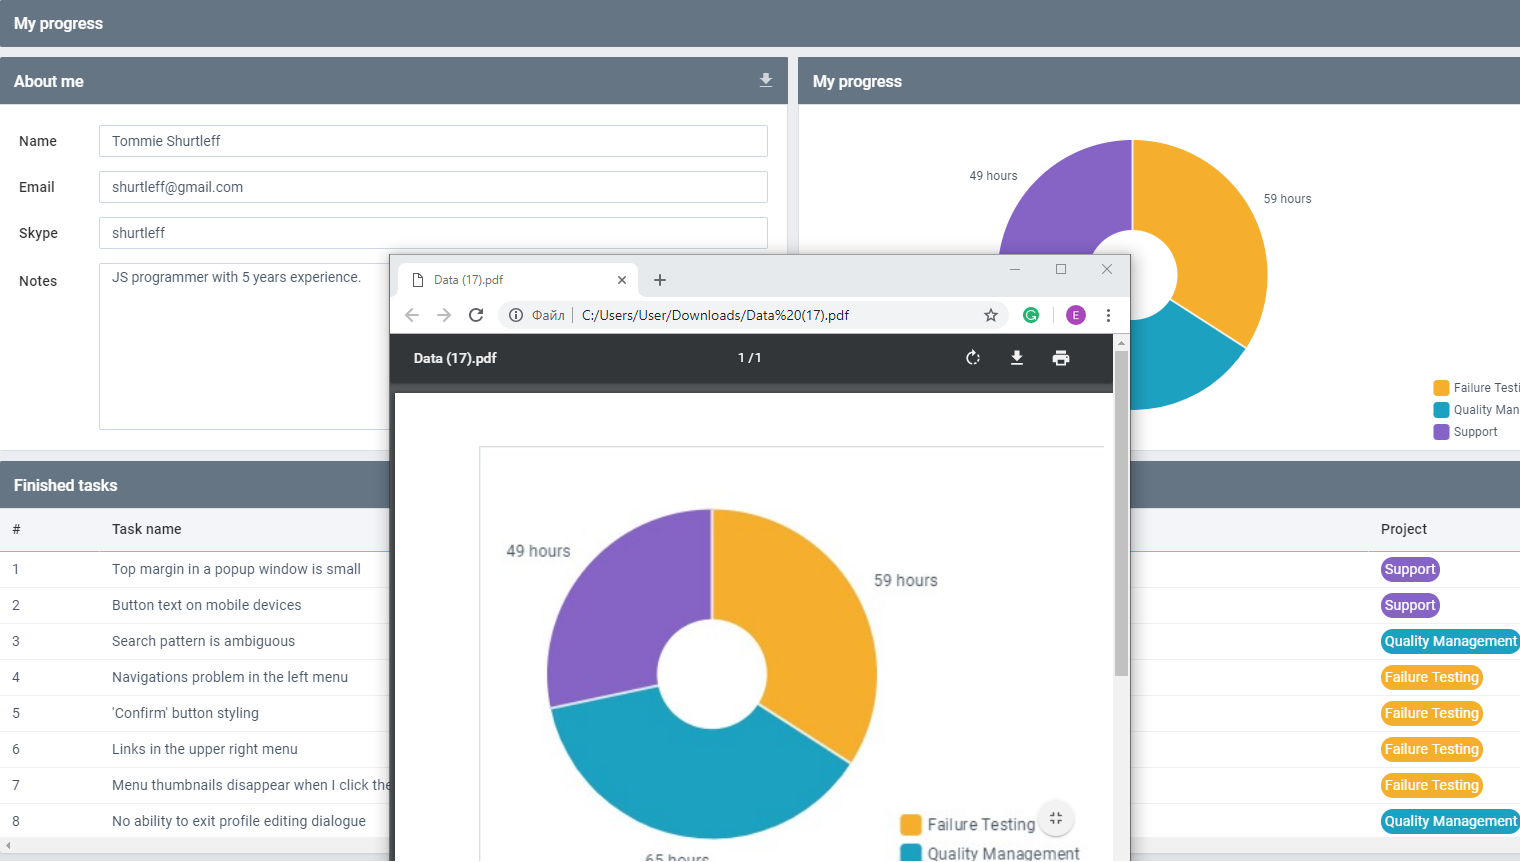
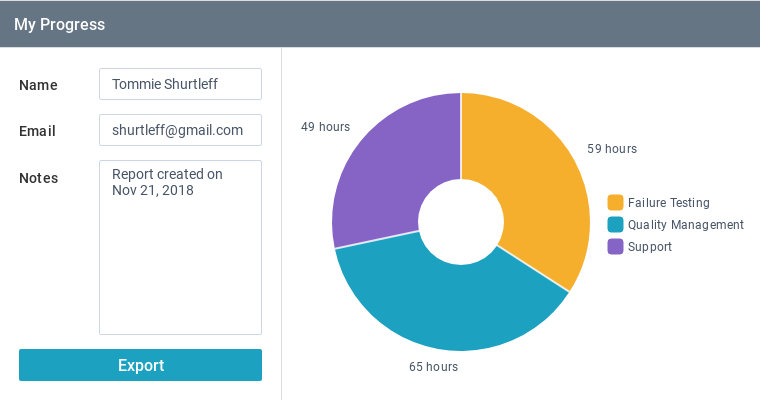
- Add notes to exported data
Customize exported forms and charts by adding notes to your report using textBefore and textAfter settings that can place a simple or formatted text before or after the widget.
textBefore:{
text:"Tommie Shurtleff JS Programmer",
options:{ color:0x666666, textAlign:"center", fontSize:15 }
},
textAfter:"11.03.2018 - 11.03.2019"
});
 App data
 Headers and footers in a PDF file
Bottom line
New functionalities enable more convenient and easy export of widgets to PDF. Now you can effortlessly customize data, design, and structure of reports generated with Webix. To sum up the information mentioned above, see the overall example of all new features for export to PDF in Webix. Check out the related documentation section where you can find more information on the topic.
If you have any questions and ideas, feel free to share them in the comments.