Managing form attachments, adding images to online galleries, sharing documents – there are lots of situations where online file uploader can be useful. Native HTML5 file upload can cope with all these tasks well, but it is not that spectacular, isn’t it?
If you need to visualize uploading process, show progress or smoothly drag and drop files for uploading, follow this article to learn how Webix javascript framework can solve these issues for you.

Webix has implemented an HTML5 solution for Javascript file upload with a fallback to flash for old browsers like IE9+. It means that you can use one and the same control that switches its background logic depending on the current browser while user experience remains the same.
And this control is called Webix Uploader:
With the above code you get the button that can open a file dialog as well as accept dragged-n-dropped files (just like the native input of the “file” type):

“Ok, I can paint the button blue myself”, – these are the words you might have just said. But don’t forget that this is how Webix library works: you get not the fish, but the fishing rod.
So, let us see what we can catch here.
Javascript file upload with Ajax requests
Each time you add files via a file dialog or drop the file over the Uploader button, the control issues an Ajax POST request using the script you have provided by the upload setting in the configuration code.
Still, you can delay the moment of requesting the server by setting the corresponding autosend property to false. Then, at any time you will be able to call the Uploader send method to push all needed files to the back end.
rows:[
{ view:"uploader", id:"upl1", link:"mylist", upload:"data/upload.php", autosend:false },
{ view:"list", id:"mylist", type:"uploader", autoheight:true },
{ view:"button", value:"Save files", click:function(){
$$("upl1").send(callback);
}}
]
});
Visualizing files for online file uploader
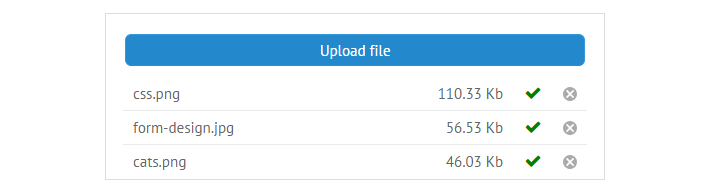
With Webix Uploader you can list all the files you upload in the related UI List widget:
rows:[
{ view:"uploader", id:"upl1", value:"Upload file", link:"mylist", ... },
{ view:"list", id:"mylist", type:"uploader", autoheight:true }
]
});
At this moment it’s important to realize that apart from being a button, Webix File Uploader stores files data in the dedicated storage. You can reach this file storage as $$(“upl1”).files.
In the above code Uploader synchronizes this storage with the “mylist” list to which it points by the link property. List is not an uploader-specific widget, but thanks to its type:”uploader” setting it can visualize file properties, e.g. file name, size, upload progress and status.
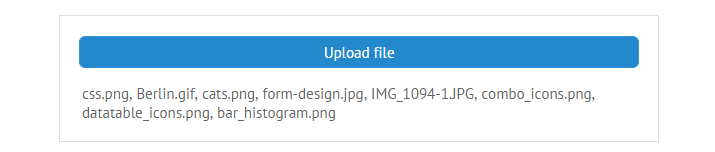
The compact alternative to file list is the DIV Templates that allow arranging file names into a compact pile.
rows:[
{ view:"uploader", value:"Upload file", link:"mytemplate", ... },
{ id:"mytemplate", template:function(data){
var names = [];
if (data.each) data.each(function(obj){ names.push(obj.name); });
return names.join(", ");
}}
]
});
Again, it’s the link property that helps the template receive the Uploader data. The template widget itself iterates the file data and forms a string that contains names of all uploading files.
Single or multiple file upload
By default, you can upload multiple files with Webix Uploader. All you need is to select several files in the dialog window or drag these files to the control.
By the way (but, tss!) I have a spoiler for you about the upcoming 4.2 release. We are preparing a directory upload, so very soon it will be possible to select a folder and meet the file crowd at the backend.
To enable single file upload, just switch off the multiple setting:
Progress bar for file upload
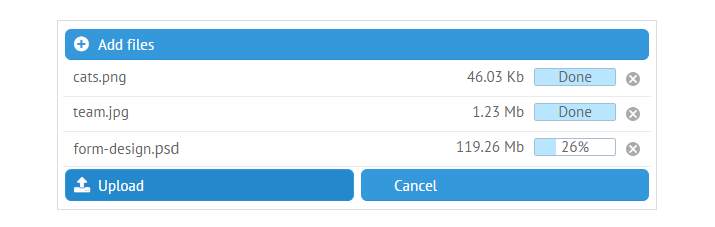
Remember my words about the fishing rod? Since progress bar is not included into the default functionality, it’s high time to use it!
On the positive side, you can tune the progress bar to look and feel exactly like it is in your imagination. And the related demo and guides will help you.
As we have already learned, we can access Uploader file storage as $$(“upl1”).files. This is Webix Datastore with its API and it helps us manipulate the data of separate files. For instance, we call get all the added files as $$(“upl1”).files.data.pull and check properties of any file.
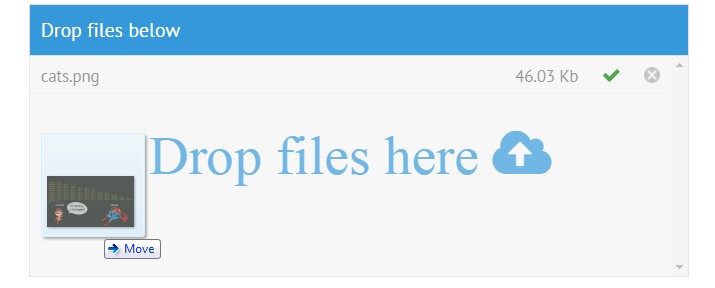
Let’s have a look at the “cats.png” file from the screenshoted file upload.
sizetext:"46.03 Kb", percent:100, status:"server" /* or "error", "client", "transfer"*/ }
The last two properties are most essential in making a progress bar as they reflect the changing values of uploading progress.
Let’s create a new type of representation for the linked list so that it can contain the progress bar:
name:"myUploader",
template:function(f, type){ … },
height:35
});
webix.ui({ view:"list", type:"myUploader"});
The new type called “myUploader” contains settings for each list item. It includes template that returns the necessary HTML for each item. Also, it may contain custom properties.
Let’s tune the template to include the progress bar into item HTML:
var html = "<div><div class='name'>"+file.name+"</div>";
html += "<div class='status'>";
html += "<div class='progress "+file.status+"' style='width:"+(file.status == 'transfer' ||
file.status=="server"?file.percent+"%": "0px")+"'></div>";
html += "<div>"+type.status(file)+"</div>";
html += "</div>";
html += "<div class='size'>"+ file.sizetext+"</div></div>";
return html;
}
The function receives file object and the type itself as parameters and returns an HTML string for the list item. The above template visualizes file name, current progress in percent and file size. The percent property of a file is constantly updated and, hence, the corresponding item is repainted.
That’s all, the progress bar is ready! You can look through the code of the full demo to see the whole picture and study the stylesheet. Also, you may check Webix guide on type implementation for data widgets to master the idea.
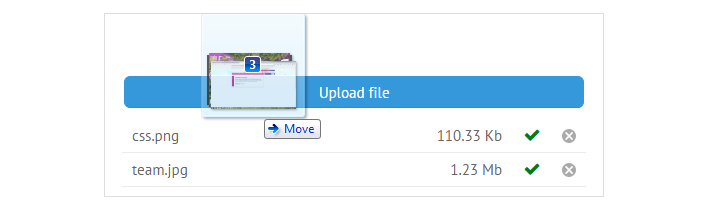
Drag and drop file upload
As you have already noticed, drag and drop file upload is possible with Webix Uploader. Just drag the files over the button and drop them – bingo!
But such default behaviour lies beyond user-friendly experience. Normally, drop areas are large and feature specific styling to ensure end users that they are on the right way to upload their files.
Let’s find out how to enable such cute drag and drop file upload with Webix Uploader.
You can hide the Uploader button and set any JavaScript UI widget as drop area for uploading. It can be either a simple template, or the whole layout, or the already known linked list.
Firstly, you should initialize Uploader outside the existing layout and switch it to the apiOnly mode. So, it will be invisible but you will still be able to use its API!
webix.ui({ view:"list", id:"mylist", type:"uploader"});
//invisible uploader
webix.ui({ view:"uploader", id:"uploaderAPI", link:"mylist", upload:"php/upload.php", apiOnly:true });
Secondly, you need to define a drop zone. Let it be the whole “mylist” list:
The mysterious $view property points to the topmost HTML element of the List widget, so the drop zone will be the list’s HTML node.
Now, when you drag files to the list, it will receive webix_drop_file class. Here’s some CSS to finish our layout:
font-family:FontAwesome;
font-size:50px;
line-height:600px;
color:#3498db;
opacity:0.7;
}
.webix_drop_file:before{
content:"Drop files here \f0ee";
}
These simple steps can lead you to the breathtaking possibilities of drag and drop file upload, e.g. adding files to image galleries and online file storages. Try it!
Powerful file upload and more
As you can see, the question of how to upload a file is fully answered by Webix. Single or multiple file upload, drag and drop or file dialog window, separate files or the whole directory (just wait 20 days for the 4.2 release) – everything is possible in the framework and is available for GPL users!
In addition, if you are looking for managing files online, you can check Webix JavaScript File Manager.
It is an integral PRO widget designed for performing various file operations including file upload and download in browser.
File upload is well documented in file uploader and supplied with demos, so there are a lot of things to play around with until the spring sun invites you for a walk.


