NodeJS is one of the hottest programming technologies. It allows creating fully functional web apps in a few lines of code. What is more, apps on NodeJS platform can be made completely in JavaScript. Using the same language on client and server side gives us real bonuses.
Let’s see how the client-side code based on Webix UI can be connected to a database with the help of NodeJS.
You can grab the final version of the code from github.
Making preparations
Assuming that you have already installed NodeJS, let’s start from installing the Express and Mongoskin libraries. The first one is a simple and robust web-framework, the second one is the DB adapter for MongoDB.
Use the following command lines to install the necessary files:
npm install mongoskin
That’s all for the server side dependencies. Now we need to create a separate folder for the client-side code. In the given case the folder will be named “public”. Now we can grab the Webix package from site or from github, and copy the files codebase/webix.js and codebase/webix.css into the “public” folder.
That’s it. All the libraries are in place, now we can start hacking.
Creating a grid
We need to have some page for our UI to reside in. Let’s create an index.html file in the “public” folder and fill it with UI initialization code:
<script type="text/javascript" src="./webix.js"></script>
<script>
webix.ready(function(){
var grid = {
id:"grid",
view:"datatable", select:"row",
columns:[
{ id:"name", header:"Name", editor:"text", fillspace:1 },
{ id:"year", editor:"text" },
{ id:"status", editor:"select", options:["", "Active", "Closed"] },
],
editable:true, editaction:"dblclick"
};
function add_row(){
$$("grid").add({ name:"New item"});
}
function delete_row(){
$$("grid").remove( $$("grid").getSelectedId(true) );
}
webix.ui({
rows:[
{ view:"toolbar", elements:[
{ view:"button", value:"Add row", click:add_row },
{ view:"button", value:"Delete row", click:delete_row },
{ gravity:2}
]},
grid
]
});
})
</script>
The above code is quite simple. At the top of the file we included Webix library, both .js and .css files. After that we described the configuration of an editable grid with 3 columns. We will init it later. The next code block contains two methods which will be used to add and delete rows in the grid. The final block includes the UI initialization code that uses all the pieces described above to create a grid and two buttons for adding and deleting rows.
If you load page directly in a browser, you will see an empty grid. It can be filled with data by clicking on the “Add row” button.
Connecting NodeJS server with MongoDB
Let’s switch to the server side code. We can create the “server.js” file in the root folder of our project and place the code for server initialization there.
Take a look at the code given below:
var path = require('path');
//connect to the mongo
var db = require('mongoskin').db("mongodb://localhost/testdb", { w: 0});
db.bind('record');
//create the app instance
var app = express();
//serve static files
app.use(express.static(path.join(__dirname, 'public')));
//parse POST data
app.use(express.bodyParser());
app.get('/data', function(req, res){
res.send([{ name:"Test 1" }, { name:"Test 2" }]);
});
app.listen(3000);
It takes 15 lines of code to init a fully functional web server and serve the data from database to the client side which is quite impressive!
Let’s look through the code. At the top of the file we included external libraries and configured the DB connection (be sure to adjust MongoDB connection string). After that we created a web-server and pointed it to our “public” folder. And at the last step we added a handler for “/data” url, which will return some dummy data (we will replace it later with actual data from MongoDB).
Now, let’s switch back to the client-side code and add one more line there:
id:"grid",
url:"/data", // <- adding this line
Thus we’ve configured the grid to load data from “/data” url.
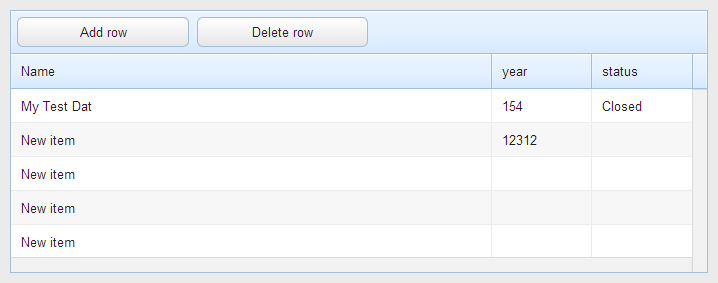
To see the result, start the node server (run “node server.js”) and open in a browser the following url: http://localhost:3000. You must see something similar to this:
Creating and saving server-side operations
The data loading was rather simple. Let’s see how the code can be extended to allow data saving.
We need to add one more line on the client side:
id:"grid",
url:"/data",
save:"rest->/data" // <- adding this line
This new line informs the client side that the same url “/data” should be used for data saving. The “rest” prefix forces the usage of the REST protocol for data saving.
On the server side we need to remove the old “/data” handler and add the logic for all kind of operations into server.js file:
if (err){
res.status(500);
res.send({ error:err.toString() });
} else {
res.send(record || {});
}
}
//data loading
app.get('/data', function(req, res){
db.record.find().toArray(function(err, data){
for (var i = 0; i < data.length; i++){
data[i].id = data[i]._id;
delete data[i]._id;
}
res.send(data);
});
});
app.post('/data', function(req, res){
db.record.insert(req.body, function(err, record){
if (err) return res.send({ status:"error" });
res.send({ newid:req.body._id });
});
});
app.put('/data/:id', function(req, res){
db.record.updateById(req.param("id"), req.body, function(err){
if (err) return res.send({ status:"error" });
res.send({});
});
});
app.delete('/data/:id', function(req, res){
db.record.removeById(req.param("id"), req.body, function(err){
if (err) return res.send({ status:"error" });
res.send({});
});
});
There are four handlers in the server-side code now: one for data loading, another one for data adding, one more handler for data updating and the last one for data deleting. In all the cases logic just takes data from request and sends it to MongoDB. The only tricky moment is the data loading. We can’t send data directly from MongoDB to the client side. Webix expects that each record has its ID as obj.id property, but Mongo uses obj._id for the same purpose. So we need to add a bit of logic to remap the ID value.
In order to do this, restart node server and refresh app’s url http://localhost:3000 in a browser. The grid is empty, but try to add a row and refresh the browser. As you can see, the data is preserved. You can add/edit/remove rows and all the changes will be stored in the database.
Result
Webix components show fine compatibility with NodeJS. It takes only several code lines on the client side to connect our UI to the database. Although the server-side code is not that small, it turned out to be universal. The same code will work with any Webix component and with any data. That is, we can add any new columns into the grid’s configuration without changing the server code, and the application will continue working correctly.


