If you are a Webix HTML5 framework user, we’d like to give you a hint on how to create a web interface with Webix UI framework quickly and easily. Believe it or not, but you need just 12 lines of JavaScript code. And of course a bit of Webix magic!

Let’s set a task to design an abstract UI for a data-rich web application which includes such components as DataTree and DataGrid.
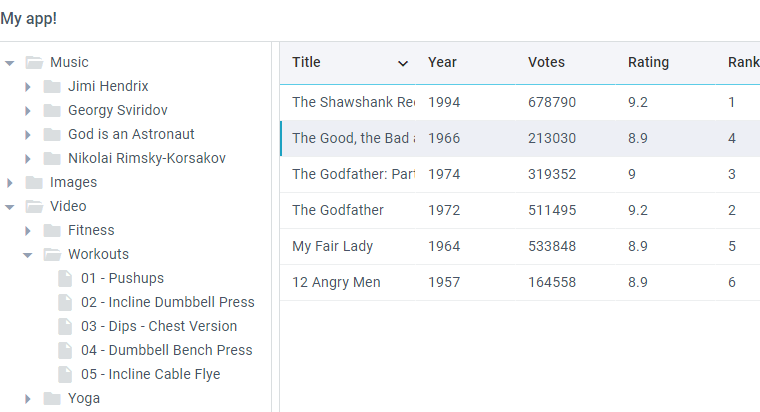
To accomplish this task, you need to take the following steps:
1. Create the layout of an app. To build the user interface, apply webix.ui(). Let’s make two rows and place a header with a caption. The lower row will be reserved for the tree and the grid.
rows:[
{ type:"header", template:"My app!" },
{ }
]
});
2. Now it is time to add components. Let’s arrange them in columns. First, add a tree with the ability to select nodes:
rows:[
{ type:"header", template:"My app!" },
{
cols:[
{ view:"tree", data:tree_data, select:true }
]
}
]
});
By default, Tree accepts a JSON array as a data source. Data items can have sub-items of their own in the “data” key, for example:
{ "id": "1", "type": "folder", "value": "Music","data": [
{ "id": "m_0", "type": "folder", "value": "Jimi Hendrix", "data": [
{ "id": "m_0_1", "type": "file", "value": "1967 - Are You Experienced?" },
{ "id": "m_0_2", "type": "file", "value": "1967 - Axis: Bold As Love" }
]},
{ "id": "m_1", "type": "folder", "value": "Georgy Sviridov" }
]},
{ "id":"2", "type": "folder", "value":"Images", "data":[
{ "id": "p_0", "type": "folder", "value": "01 - Christmas" },
{ "id": "p_1", "type": "folder", "value": "02 - New Year's Eve" }
]}
]
Tree, like all Webix data components, also supports the XML and CSV data format.
The tree is ready, now it’s about time to create a datagrid and place it next to the tree:
rows:[
{ type:"header", template:"My app!" },
{
cols:[
{ view:"tree", data:tree_data, select:true },
{ view:"datatable", autoConfig:true, data:grid_data }
]
}
]
});
The autoConfig setting configures the Datatable columns; all you have to do is give the Datatable the data.
By default, Datatable requires a JSON array with data items, e.g.:
{
"id": 1,
"title": "The Shawshank Redemption",
"year": 1994
},
{
"id": 2,
"title": "The Godfather",
"year": 1972
}
]
The app prototype is almost ready, but if you want to load data from the real server, set the path to your script or service as url:”some/path” instead of data:
rows:[
{ type:"header", template:"My app!" },
{
cols:[
{ view:"tree", url:"/data/data_json.php", select:true },
{ view:"datatable", autoConfig:true, url:"/data/data.php" }
]
}
]
});
Datatables also support XML and CSV.
3. There is one last thing that you can do. Let’s configure the layout dimensions and make the tree thrice as narrow as the Datatable. Use the gravity setting for this. Let’s also add a resizable border between the tree and the datatable.
rows:[
{ type:"header", template:"My app!" },
{
cols:[
{ view:"tree", data:tree_data, select:true, gravity:0.3 },
{ view:"resizer" },
{ view:"datatable", autoConfig:true, data:grid_data }
]
}
]
});
As you see, you really need just 12 lines of code, and Webix does the greater part of work for you.
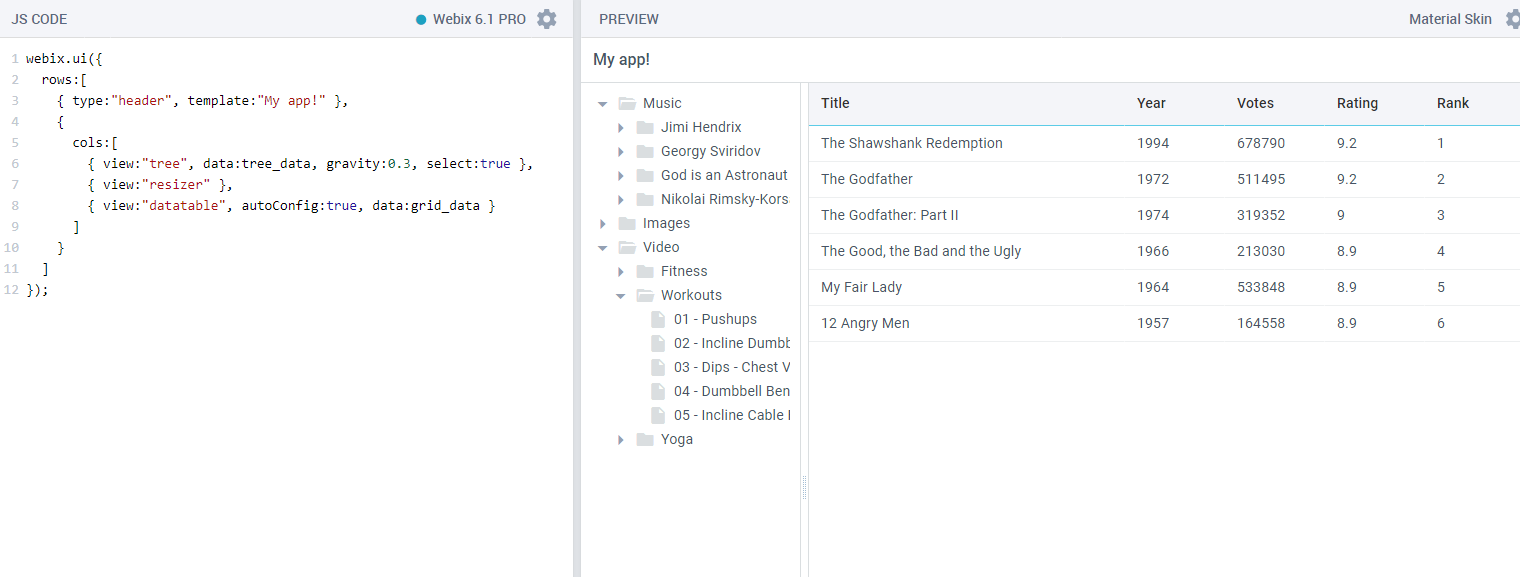
Of course, further customization and integration will require additional efforts. But the time saved on building the UI of your business application and more than 99 ready-made UI widgets make Webix a great tool for:
• the development of fast and efficient front-end web solutions;
• rapid prototyping of UI interfaces;
• the creation of Single-Page Business Applications.
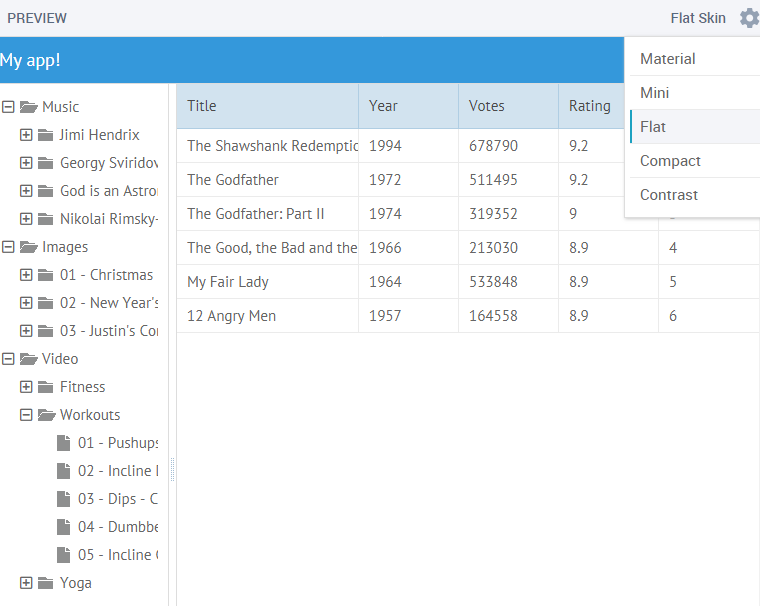
And don’t forget that Webix UI Framework contains five skins that give you an opportunity to choose how the application will look like without additional styling.
Bottom line
Webix UI framework is an excellent source of ready-made UI controls and widgets that are aimed to facilitate the development process. With only 12 lines of code, you can create a user interface for your future software solution. If you are not a Webix user yet, don’t miss a chance to try it and save your time and efforts in developing web applications.
